


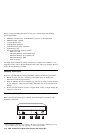


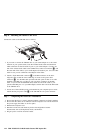
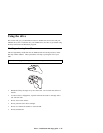
Step 6. Attaching the cables to the drive
Connect the cables to the CD-RW drive as follows.
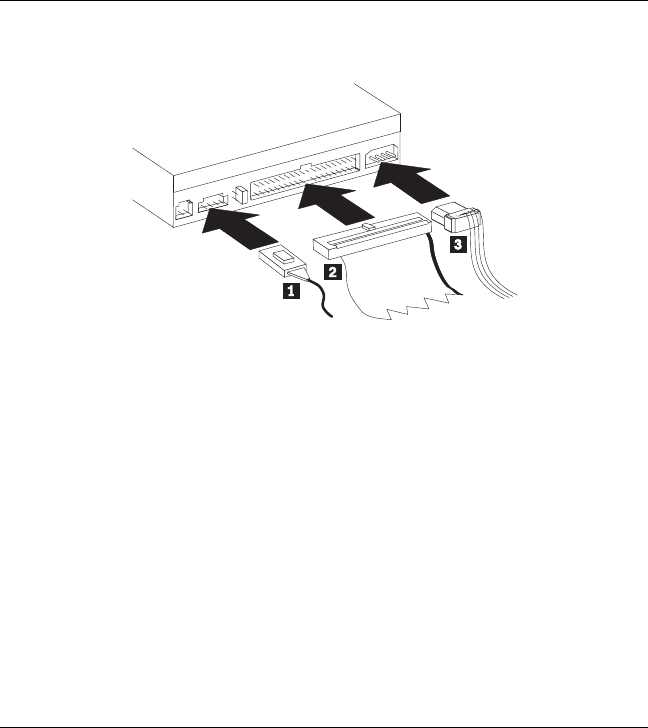
1. If you want to connect the CD-RW drive to your sound adapter or to the sound
function on your system board, locate the included audio cables and determine
which cable best fits the CD audio-in port on your sound adapter. Connect one
end of the selected audio cable to the CD-RW drive audio-out connector 1, and
the other end of the cable to your sound adapter CD audio-in port. Save the other
cable in case you use a different sound adapter in the future.
2. Attach a 40-pin IDE-cable connector 2 to the IDE connector on the drive.
Align the cable so that the color-coded edge is closest to the power cable
connector 3. Use the IDE cable provided with this option if there is no cable
attached to the IDE port or if there is only one device connector on the IDE
cable. If you use the included IDE cable, attach one end of the cable to your
system board IDE port or to your IDE adapter, and the other end of the IDE cable
to the CD-RW drive.
3. Locate one of the available power cords attached to your computer power source.
Attach the four-pin power cable 3 to the CD-RW drive dc power connector.
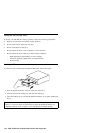
Step 7. Completing the hardware installation
1. Be sure that the drive is securely mounted and the connectors are firmly attached.
2. Be sure that the cables do not interfere with the computer cover and do not block
the power-supply fan blades or air-flow paths.
3. Reinstall the computer cover.
4. Reconnect all devices and check any devices that might have become
disconnected, such as the keyboard, mouse, and monitor.
5. Plug all power cords into electrical outlets.
1-22 IBM 4X/8X/32X CD-ReWritable Internal IDE Option Kit