


Removing
and
replacing
the
system
board
assembly
Important
Before
you
install
or
remove
any
component,
read
“Important
safety
information”
on
page
v.
These
precautions
and
guidelines
will
help
you
work
safely.
Attention:
If
your
computer
has
been
turned
off
for
a
long
period
of
time,
the
thermal
grease
between
the
microprocessor
heat
sink
and
the
microprocessor
might
not
allow
them
to
be
separated
easily.
In
this
case
turn
on
your
computer
for
a
few
minutes
to
soften
the
grease.
To
remove
and
replace
the
system
board
assembly,
do
the
following:
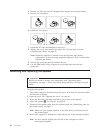
1.
Turn
off
the
computer
and
disconnect
the
power
cord
from
the
electrical
outlet
and
from
the
computer.
2.
Open
the
cover.
See
“Opening
the
cover”
on
page
10.
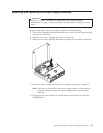
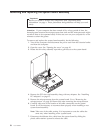
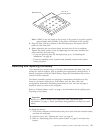
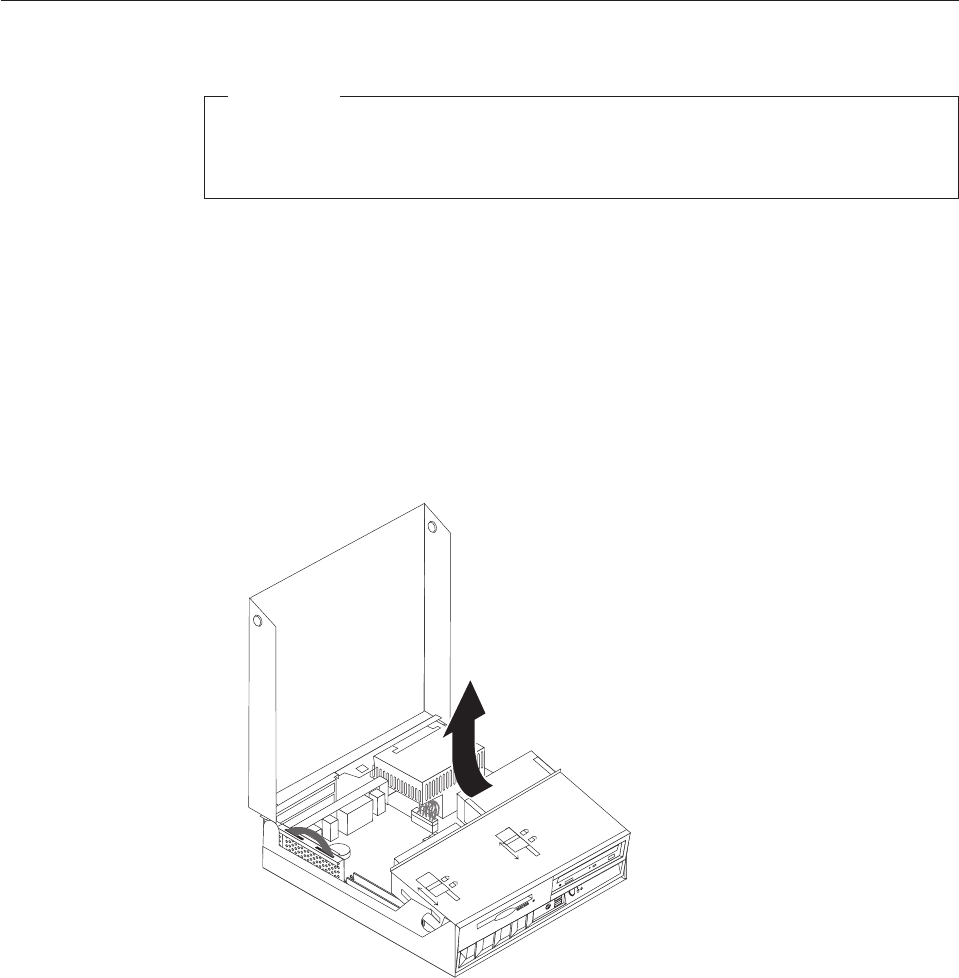
3.
Rotate
the
drive
bay
assembly
upward
to
gain
access
to
the
system
board.
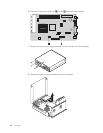
4.
Remove
the
PCI
riser
card
assembly
along
with
any
adapters.
See
“Installing
PCI
adapters”
on
page
15.
5.
Remove
the
microprocessor
from
the
system
board.
Go
to
“Removing
the
microprocessor”
on
page
38.
Return
here
after
removing
the
microprocessor.
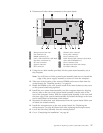
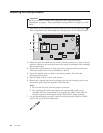
6.
Carefully
take
note
of
the
location
of
all
cable
connections
on
the
system
board.
It
will
be
necessary
to
reconnect
them
properly
when
installing
a
new
system
board
assembly.
Note:
Take
note
of
the
cable
routing.
It
is
important
to
route
the
cables
the
same
way
when
installing
a
new
system
board.
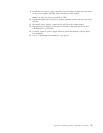
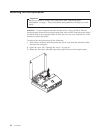
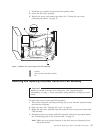
7.
Disconnect
the
diskette
drive
cable
from
the
system
board
by
sliding
the
plastic
cable
retainer
upward
to
release
the
cable.
36
User
Guide