


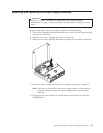
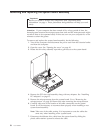
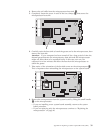
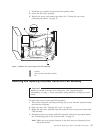

4.
Remove
the
air
baffle
from
the
microprocessor
heat
sink
1.
5.
Completely
loosen
the
screw
in
each
of
the
two
clamps
2
that
secure
the
microprocessor
heat
sink.
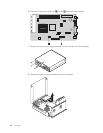
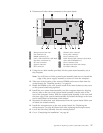
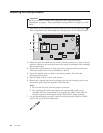
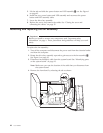
6.
Carefully
twist
the
heat
sink
to
break
the
grease
seal
to
the
microprocessor,
then
remove
the
heat
sink.
Attention:
If
your
computer
has
been
turned
off
for
a
long
period
of
time
the
thermal
grease
between
the
microprocessor
heat
sink
and
the
microprocessor
might
not
allow
them
to
be
separated
easily.
In
this
case,
turn
on
your
computer
for
a
few
minutes
and
allow
the
heat
from
the
microprocessor
to
soften
the
grease.
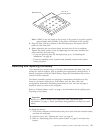
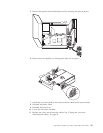
7.
Take
notice
of
the
orientation
of
the
beveled
corner
on
the
microprocessor
2.
This
is
important
when
reinstalling
the
microprocessor
on
the
system
board.
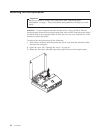
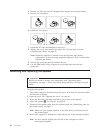
8.
Remove
the
microprocessor
from
the
system
board
by
lifting
the
small
handle
1
on
the
microprocessor.
v
If
you
are
installing
a
new
system
board
assembly,
return
to
the
system
board
procedure.
v
If
you
are
replacing
only
the
microprocessor,
continue
to
“Replacing
the
microprocessor”
on
page
40.
Appendix
A.
Replacing
customer
replaceable
units
(CRU)
39