


70 Intel
®
Server System SR1550AL/SR1550ALSAS User’s Guide
Reinstalling the Mini Control Panel
Your system comes with a mini control panel installed. You can remove this and replace it
with a standard control panel or the Intel
®
Local Control Panel. If your system has a
standard control panel or the Intel
®
Local Control Panel installed and you wish to reinstall
the mini control panel, follow the instructions below.
Note: If you reinstall the mini control panel, your system is now capable of supporting up to
eight 2.5” hard drives.
Caution: The control panel is NOT hot swappable. Before removing or replacing the control panel,
you must first take the server out of service, turn off all peripheral devices connected to
the system, turn off the system by pressing the power button, and unplug the AC power
cord from the system or wall outlet.
Reinstalling the Mini Control Panel
1. Observe the safety and ESD precautions at the beginning of this book. See “Safety
Information”.
2. Power down the server and unplug all peripheral devices and the AC power cable.
3. Remove the front bezel if it is installed. For instructions, see “Removing the Front
Bezel”.
4. Remove the server system cover. For instructions, see “Removing the Chassis
Cover”.
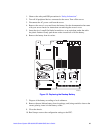
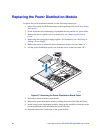
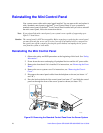
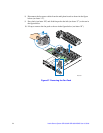
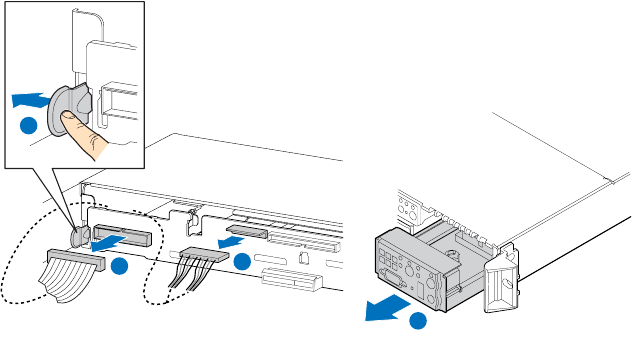
5. Disconnect the control panel cables from the backplane as shown (see letters “A”
and “B”).
6. Press the latch at the back of the control panel (see letter “C”) and slide the control
panel out through the front of the server system as shown (see letter “D”).
Figure 62. Removing the Standard Control Panel from the Server System
D
A
B
TP02256
C