


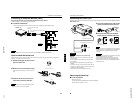


DLA-G150HTE
1-25
No.51847
45
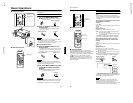
Menu Operations
ENGLISHDEUTSHFRANÇAISITALIANOESPAÑOL
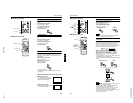
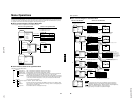
Changing the Language Display
The on-screen language is set to “English” when shipped from the factory. When you want to change to another language, set
it as follows.
1
Press the MENU button.
The main menu appears on the screen.
2
Select “Language” with the cursor button 5 or ∞
∞∞
∞, and press 3
33
3 or the ENTER button.
The “Language” submenu appears on the screen.
3
Set the language with the cursor button 5 or ∞
∞∞
∞.
4
Press the EXIT button to return to the previous menu or press the MENU button to
exit the menu mode.
Memo
About language display
Some words in the menu and messages such as “Quick Alignment”, “Keystone”, “VIDEO” and “NTSC” are shown only in
English.
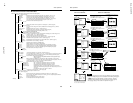
Changing the Screen aspect ratio/HDTV format (Video Menu
Mode Only)
1
Press the MENU button.
The main menu appears on the screen.
2
Select “Setting” with the cursor button 5 or ∞
∞∞
∞, and press 3
33
3 or the ENTER button.
The “Setting 1” submenu appears on the screen.
3
Select “Setting 2” with the cursor button 5 or ∞
∞∞
∞, and press 3
33
3 or the ENTER button.
The “Setting 2” submenu appears on the screen.
4
Select “Screen” or “HDTV” with the cursor button 5 or ∞
∞∞
∞.
5
Adjust the Screen aspect ratio or HDTV format with the cursor button 2
22
2 or 3
33
3.
To adjust multiple items, repeat 4 and 5.
6
Press the EXIT button to return to the previous menu or press the MENU button to
exit the menu mode.
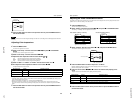
Adjustment item Button Adjustment content
Screen 2 or 3
Select according to the aspect ratio of the screen used.
4:3 16:9
HDTV 2 or 3
Set the number of effective scanning lines. Normally, select 1080i.
1080i: 1035i:
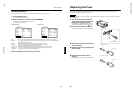
Language
English
Deutsch
Español
Italiano
Français
: Japanese
English : English
Deutsch : German
Español : Spanish
Italiano : Italian
Français : French
46
Menu Operations
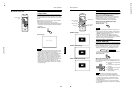
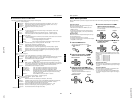
Adjusting Tracking/Phase
Normally, tracking and phase adjustments are automatically carried out when a video signal is input to the projector for the
first time, or when the QUICK ALIGN. button on the remote control is pressed.
However, you can manually adjust the tracking and phase on the menu.
If a wide stripe appears on the screen, adjust the lateral size of the picture image and the display area (tracking adjustment)
so the stripe disappears.
Also, if text projected on the screen appears flickers or appears dim, adjust phase adjustment so it becomes clear.
1
Press the MENU button.
The main menu appears on the screen.
2
Select “Setting” with the cursor button 5 or ∞
∞∞
∞, and press 3
33
3 or the ENTER button.
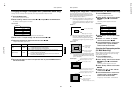
The “Setting 1” (video mode) or “Setting” submenu appears on the screen.
In video mode: Select setting 2 with the cursor ∞ or 5, and press ENTER button.
The “Setting 2” submenu appears on the screen.
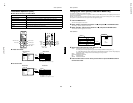
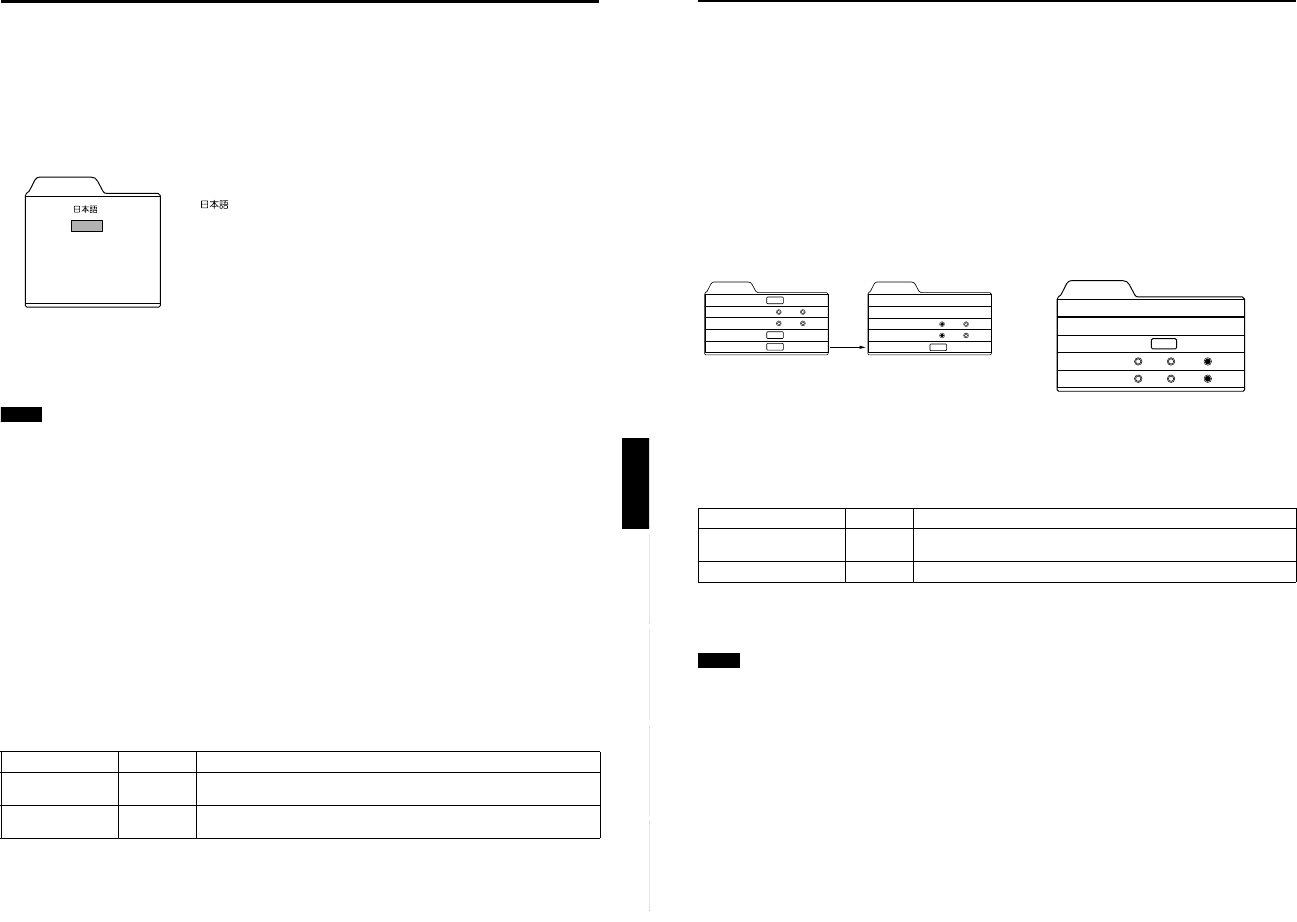
Video submenu PC submenu
3
Select “Tracking” or “Phase” with the cursor button 5 or ∞
∞∞
∞.
4
Adjust the tracking or phase with the cursor 2
22
2 or 3
33
3.
Adjust the tracking and phase of the picture image being projected. To adjust the phase, first check for correct tracking
adjustment.
*To adjust multiple items, repeat 3 and 4.
5
Press the EXIT button to return to the previous menu or press the MENU button to
exit the menu mode.
Note
• A dim image could be caused by insufficient adjustment of brightness and contrast. Before adjusting phase, make sure that
brightness and contrast are correctly adjusted. To adjust them, refer to “Adjusting Picture Quality” on page 48.
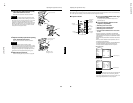
Setting 1
Position
Tone
Aspect change
Decoder
Setting 2
ENTER
ENTER
ENTER
TV
4:3
Cinema
16:9
Setting 2
Tracking
Phase
Screen
HDTV
Setting 1
123
12
ENTER
4:3
1080i
16:9
1035i
Decoder is only displayed when there is a signal for the AV
IN terminal.
Setting
Tracking
Phase
Position
Resize
Clamp
123
12
ENTER
ST FP BP
1:1 Panel Aspect
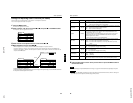
Adjustment item Button Adjustment content
Tracking
2
or
3
The picture image shrinks laterally (right-to-left) or extends laterally (left-to-
right). (–128 ↔ +127)
Phase
2
or
3
Set to a position where text appears clear. (0
↔
31)