


6-6 A-61500 April 2009
i600 Series Scanners
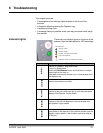
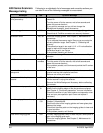
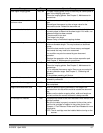
Message listing
Following is an alphabetic list of messages and corrective actions you
can take if one of the following messages is encountered.
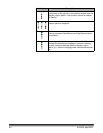
Messages ID# Operator Message
Background accessory changed
while powered up
381 The Background Accessory was changed while the scanner was
powered on.
• Turn the power off to the scanner, wait a few seconds and
power the scanner back on.
• If you get this message and you did not change the
Background Accessory, clean the scanner.
Cable unplugged 319 Some device on the FireWire bus was unplugged/plugged in.
• Check that all FireWire connectors are securely fastened.
Calibration failed 106, 331 • Clean the imaging guides. See Chapter 5, Maintenance for
procedures.
• Try to calibrate the scanner again. Be sure you are using the
correct calibration target. See Chapter 3, “Calibrating the
scanner”.
• The calibration target is too small. A 12- x 12-inch calibration
target is required for image calibration.
• Calibration target is too narrow.
• If the problem persists, call Service.
Calibration succeeded 105, 342 Informational message. The scanner has been successfully
calibrated.
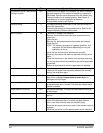
Call Service Many ID
numbers
A condition was detected that may require repair.
• Turn the power off to the scanner, wait a few seconds and
power the scanner back on.
• If the problem persists, call Service and provide the ID number
of the error.
Cannot calibrate with white
background
184 Both a front and rear print head is installed in the scanner. Only
one print head can be installed at one time.
• Remove one of the print heads.
Cannot run with both printers
installed
90 The White Background Accessory is installed in the scanner
while the scanner is trying the calibrate.
• Remove the White Background Accessory before calibrating
the scanner.
Check document preparation 123, 135,
81
• The gap between your documents is too small.
• Make sure the leading edges of the documents are aligned.
See Chapter 3, “Document preparation” for more information.
• Check the condition of your feed module and separation roller
tires and your pre-separation pad. Clean and replace if
necessary.
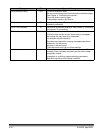
Check imaging guides and lamps 149, 178,
139
• Verify that the imaging guides are installed correctly. See
Chapter 5, Maintenance.
• Clean both sides of the imaging guides and lower glass plate
between the lamps.
• Check that the white patch on the imaging guides is clean and
in good condition.
• If the problem persists, call Service.
Clean lower imaging guide 294 The lower imaging guide is dirty or there may be a small piece of
paper in the imaging guide area.
• Clean the imaging guides. See Chapter 5, Maintenance for
procedures.