Basic operations
3
3-4 bizhub 164
3.2
3.2 Basic operations
3.2.1 Loading paper
This section describes how to load paper into each paper tray.
For the types of paper to be used, refer to page 12-3.
Loading paper in Tray 1
0 Make sure that the original and the loaded paper have the same orientation. Otherwise, some parts of
the image may be lost.
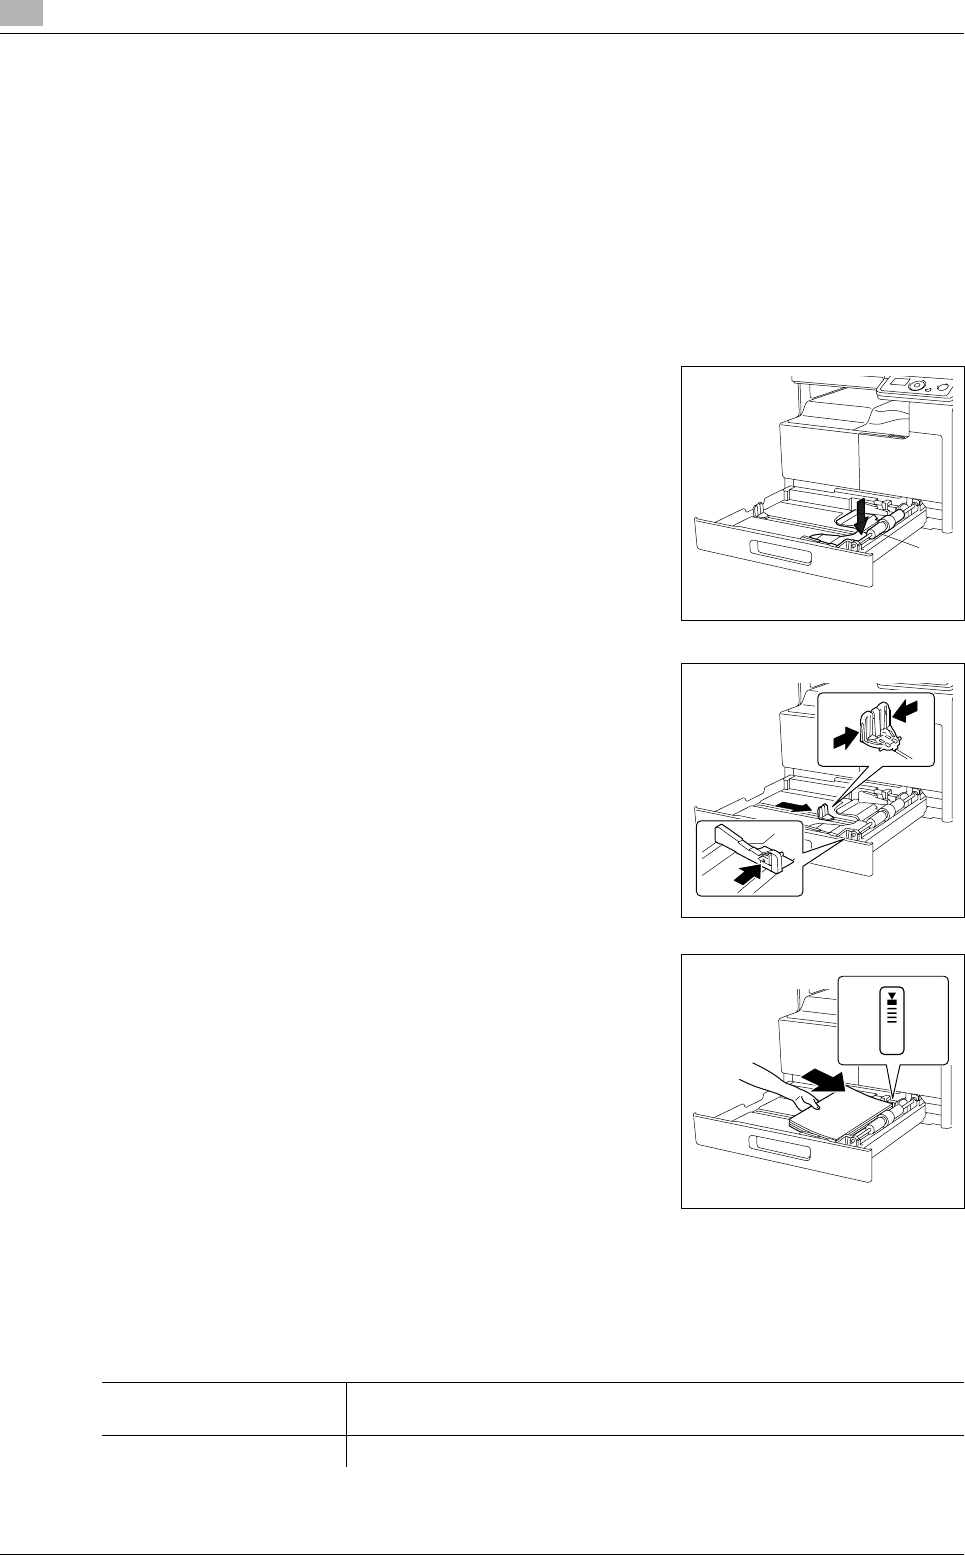
1 Pull out Tray 1.
2 Press down on the Paper-Lifting Plate until it locks into place.
% 1. Paper Take-Up Roller
NOTICE
Be careful not to touch the Paper Take-Up Roller.
3 Slide the Lateral Guides to fit the size of paper being loaded.
% To load the custom size, load the paper, then adjust the Lat-
eral Guides to the size of the paper being loaded.
4 Load the paper into the paper tray so that the side of the paper to
be printed on (the side facing up when the package was un-
wrapped) faces up.
% Do not load so many sheets of paper that the top of the stack
is higher than the , mark.
% If paper is curled, flatten it before loading it.
% Allows you to load up to 250 sheets of plain paper, or 20
sheets of card in the paper tray.
5 Close Tray 1.
6 Specify the paper size and paper type for Tray 1.
% Press the Menu/Select key ö [COPY JOB SETTING] ö [TRAY1 PAPER].
1
Settings
[SIZE] Select a paper size.
For details on how to configure a custom size, refer to page 3-6.
[TYPE] Select a paper type.
