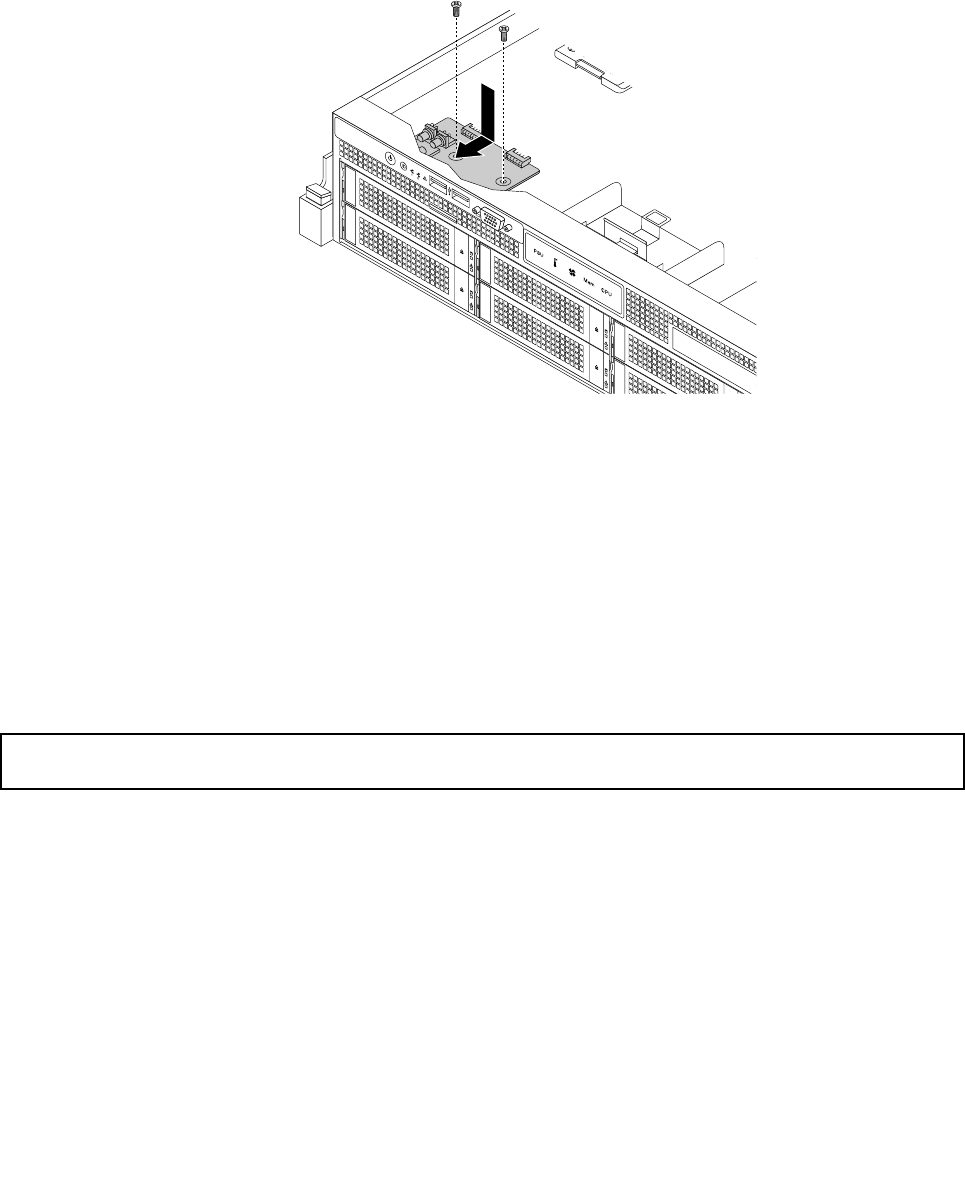
8. Carefully position the new front panel board on the chassis so that the front controls, connectors,
and LEDs are through the corresponding holes in the front bezel and the two screw holes in the new
front panel board are aligned with the corresponding mounting studs on the chassis. Then, install the
screws to secure the front panel board in place.
Figure 110. Installing the front panel board for server models with 3.5-inch hard disk drives
9. Connect the front panel cable and the front panel USB cable to the rear of the new front panel board.
10. If you are instructed to return the old front panel board, follow all packaging instructions and use any
packaging materials that are supplied to you for shipping.
What to do next:
• To work with another piece of hardware, go to the appropriate section.
• To complete the replacement, go to “Completing the parts replacement” on page 153
.
Replacing the front panel board for server models with 2.5-inch hard disk drives
Attention: Do not open your server or attempt any repair before reading and understanding “Safety information”
on page iii and “Guidelines” on page 69.
To replace the front panel board for server models with 2.5-inch hard disk drives, do the following:
1. Remove all media from the drives and turn off all attached devices and the server. Then, disconnect all
power cords from electrical outlets and disconnect all cables that are connected to the server.
2. If the server is installed in a rack cabinet, remove the server from the rack cabinet and place it on a at,
clean, and static-protective surface. See the Rack Installation Instructions that comes with the server.
3. Remove the server cover. See “Removing the server cover” on page 71.
4. Remove the front bezel. See “Removing and reinstalling the front bezel” on page 73.
5. Remove the cooling shroud. See “Removing and reinstalling the cooling shroud” on page 76.
6. Locate the front panel board. See “Server components” on page 29.
7. Remove the left cage. See “Removing and reinstalling the left cage” on page 78.
144 ThinkServer User Guide


