6. At the rear of the computer, pivot the adapter latch to the closed position to secure the adapter.
7. Go to "Completing the FRU replacement" on page 91.
Replacing the hard disk drive
Attention
Do not open your computer or attempt any repair before reading and understanding the "Important safety information"
in the ThinkCentre Safety and Warranty Guide that came with your computer. To obtain a copy of the ThinkCentre
Safety and Warranty Guide, go to:http://www.lenovo.com/support
This section provides information on how to remove and replace the hard disk drive.
To remove or replace the hard disk drive, do the following:
1. Remove the computer cover. See "Removing the cover" on page 68.
Note: For this procedure, it helps to lay the computer on its side.
2. Disconnect the signal and power cables from the hard disk drive.
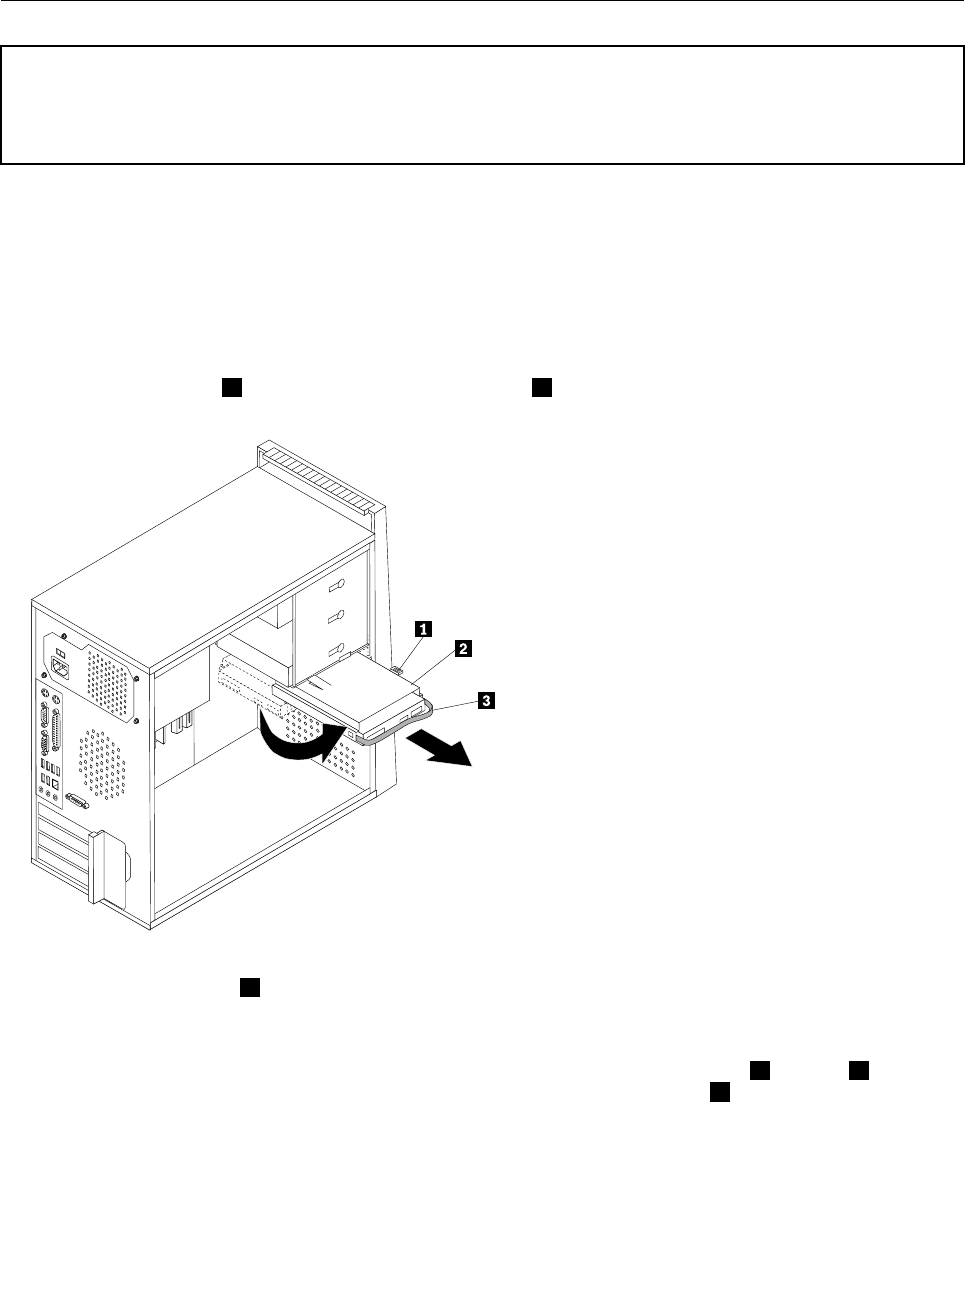
3. Press the release tab 1 down, slide the hard drive cage 2 back, and pivot the hard disk drive outward
as shown.
4. Remove the hard disk drive cage from the chassis by simply sliding it outward.
5. Pull on the blue handle 3 to remove hard disk drive from the drive cage.
6. Remove the failing hard disk drive from the blue plastic bracket from by exing the sides of the bracket
enough to free it from the hard disk drive.
7. To install the new drive into the blue bracket, ex the bracket, and align the pins 1 through 4 on the
bracket with the holes in the hard disk drive. Do not touch the circuit board 5 on the bottom of the
hard disk drive.
82 ThinkCentre Hardware Maintenance Manual


