


Replacing the rear fan assembly
Attention
Do not open your computer or attempt any repair before reading and
understanding the “Important safety information” in the ThinkStation Safety
and Warranty Guide that came with your computer. To obtain a copy of the
ThinkStation Safety and Warranty Guide,goto:
http://www.lenovo.com/support
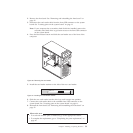
This section provides instructions on how to replace the rear fan assembly.
To replace the rear fan assembly, do the following:
1. Remove the computer cover. See “Removing the computer cover” on page 14.
2. Locate the rear fan assembly. See “Locating components” on page 10.
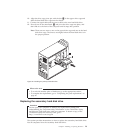
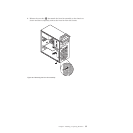
3. Disconnect the rear fan assembly cable from the system fan connector on the
system board. See “Locating parts on the system board” on page 11.
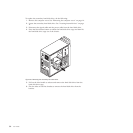
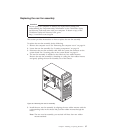
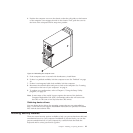
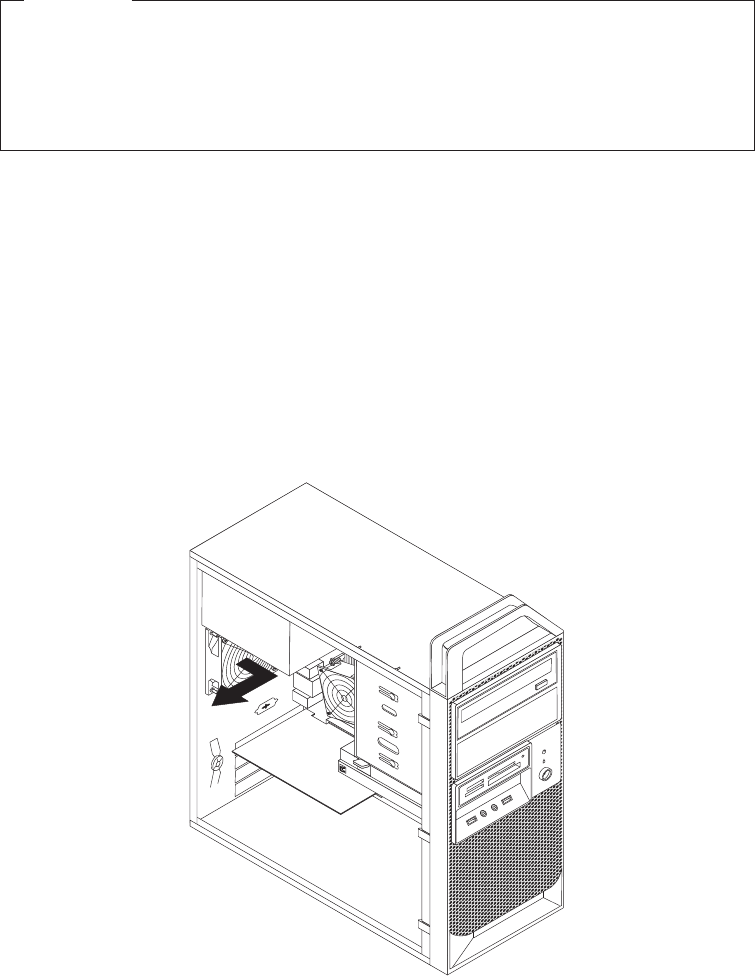
4. The rear fan assembly is attached to the chassis by four rubber mounts.
Remove the rear fan assembly by breaking or cutting the four rubber mounts
and gently pulling the rear fan assembly out of the chassis.
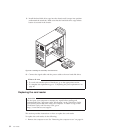
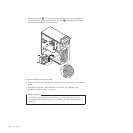
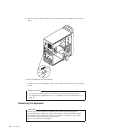
5. Install the new rear fan assembly by aligning the new rubber mounts with the
corresponding holes in the chassis and push the rubber mounts through the
holes.
Note: The new rear fan assembly you received will have four new rubber
mounts attached.
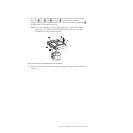
Figure 30. Removing the rear fan assembly
Chapter 2. Installing or replacing hardware 37