


• If your computer has only one CPU installed, be sure to install memory modules only in the memory
slots adjacent to that CPU.
• If your computer has two CPUs installed, install equal numbers of memory modules in both sets of CPU
DIMM slots for maximum performance.
To install or replace a memory module, do the following:
1. Remove all media from the drives and turn off all attached devices and the computer. Then, disconnect
all power cords from electrical outlets and disconnect all cables that are connected to the computer.
2. Remove the computer cover. See “Removing the computer cover” on page 13.
3. Remove the PCI card holder. See “Removing and reinstalling the PCI card holder” on page 15.
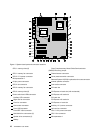
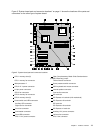
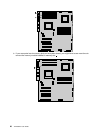
4. Locate the memory slots. See “Locating parts and connectors on the system board” on page 9.
5. Depending on the memory module that you are replacing, do one of the following:
• If you are replacing the memory module adjacent to CPU 1, go to step 6.
• If you are replacing the memory module adjacent to CPU 2, do the following:
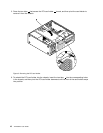
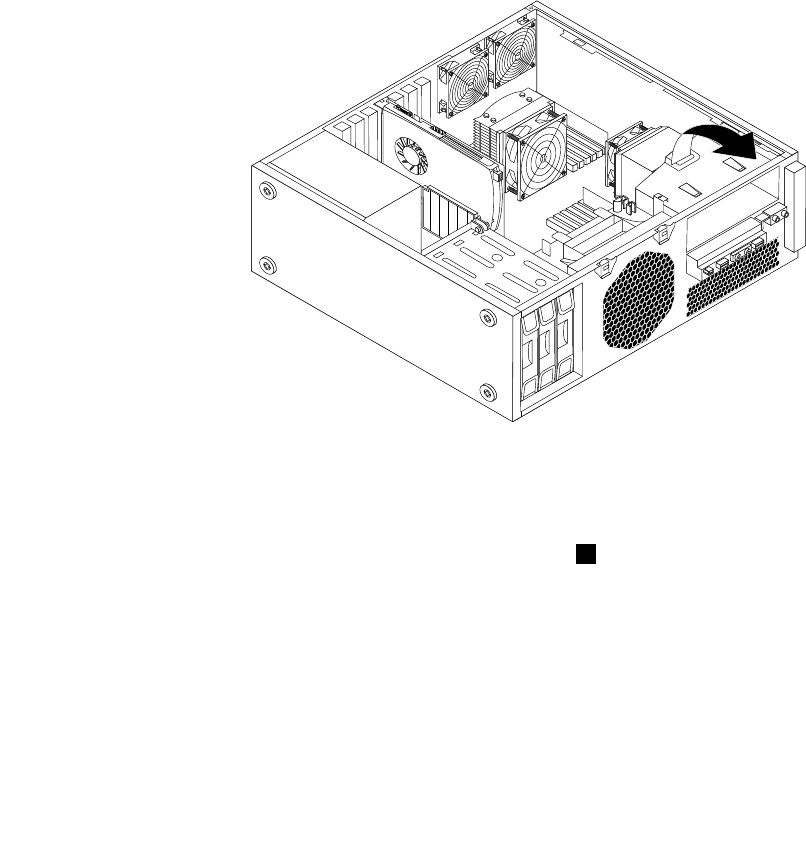
a. Remove the optical drive. See “Replacing the optical drive” on page 27.
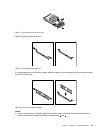
b. Pivot the optical drive bracket as shown in the following illustration and then remove it from
the chassis. Go to step 6.
Figure 10. Removing the optical drive bracket
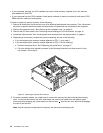
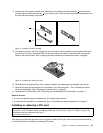
6. For some computer models, you might need to remove the memory fan duct to access the memory
slots. To remove the memory fan duct, disconnect the memory fan cable from the system board,
remove the blue shipping clip, press inward on the two tabs 1 , pivot the fan duct, and then disengage
the rear of the fan duct.
Note: Not all computer models have the memory fan duct and blue shipping clip.
18 ThinkStation User Guide