


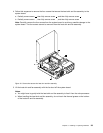
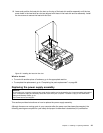
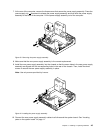


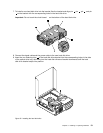

7. At the rear of the computer, remove the three screws that secure the power supply assembly. Press the
power supply clip 1 downward to release the power supply assembly and then slide the power supply
assembly to the front of the computer. Lift the power supply assembly out of the computer.
Figure 23. Removing the power supply assembly
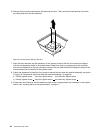
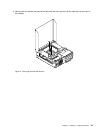
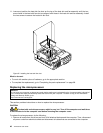
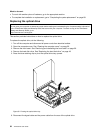
8. Make sure that the new power supply assembly is the correct replacement.
9. Install the new power supply assembly into the chassis so that the screw holes in the new power supply
assembly are aligned with the corresponding holes in the rear of the chassis. Then, install the three
screws to secure the new power supply assembly in place.
Note: Use only screws provided by Lenovo.
Figure 24. Installing the power supply assembly
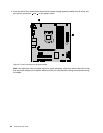
10. Connect the new power supply assembly cables to all drives and the system board. See “Locating
parts on the system board” on page 11.
Chapter 5. Installing or replacing hardware 45