


Chapter 3. Using the wireless features
This chapter provides information on using the wireless features of the C400
Wireless Projector.
Installation
Follow the instructions below to install the Lenovo Wireless Projecting Software.
Note: If there is a previous version of Lenovo Wireless Projecting Software, it is
recommended to first uninstall it, then restart the computer prior to
installing the new version.
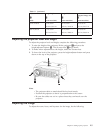
To install the software from the CD or view the User’s guide:
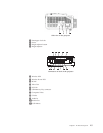
1. Insert the C400 Wireless Projector Software & User’s Guide CD into the CD
or DVD drive. If the CD starts automatically, go to Step 5.
2. If the CD does not start, click Start and then click Run.
3. Type e:\launch.bat where e is the drive letter of the CD or DVD drive.
4. Click OK. The CD browser window opens.
5. Follow the on-screen instructions.
Using the projector software
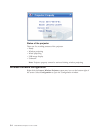
Lenovo Wireless Projecting Software includes many features such as:
v Starting a wireless projecting session
v Searching for a wireless projector
v Binding a wireless projector
v Retrieving the property details of a wireless projector
v Quick projection
v Selecting a WLAN adapter
v Remote control emulation
v USB image display
v Ending a wireless projecting session
Starting a wireless projecting session
To start a wireless projecting session, please follow the steps below:
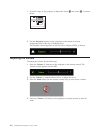
1. Turn on the wireless projector.
2. Start the Wireless Projecting Software either through the Start menu or through
the desktop icon.
Note: ThinkPad users can press Fn+F7 and use the pre-set scheme;
Presentation on Lenovo Wireless Projector.
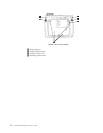
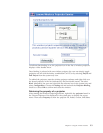
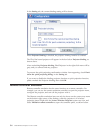
3. The Wireless Projecting Software will then search for wireless projectors and
available projectors will be listed. Clicking Refresh will refresh the list.
For a WEP-enabled wireless projector, there will be a lock mark on the top left
corner of the projector icon.
© Lenovo 2005. Portions © IBM Corp. 2004. 3-1