


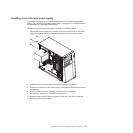

Installing a microprocessor and fan sink
To install the microprocessor, complete the following steps:
1. Touch the static-protective package that contains the microprocessor to any
unpainted metal surface on the server. Then, remove the microprocessor from
the package.
2. Remove the protective cover, tape, or label from the surface of the
microprocessor socket, if any is present.
3. Rotate the release lever on the microprocessor socket to the fully open
position.
Attention: Make sure that the release lever on the microprocessor socket is
in the fully open position before you insert the microprocessor in the socket.
Failure to do so might result in permanent damage to the microprocessor,
microprocessor socket, and system board.
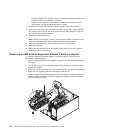
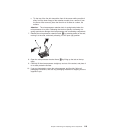
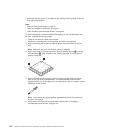
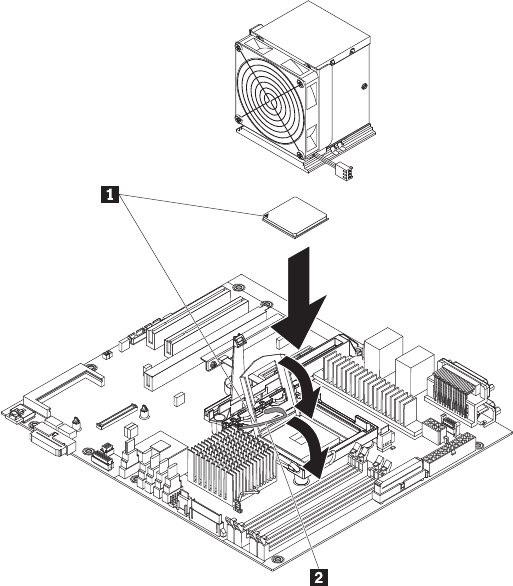
4. Carefully grasp the microprocessor and place the microprocessor into the
microprocessor socket.
Note: To maintain correct orientation between the microprocessor and the
microprocessor socket during installation, observe the following information:
v The microprocessor has two notches that are keyed to two tabs on the
sides of the socket.
v A triangle-shaped indicator on one corner of the microprocessor points to a
45-degree angle on one corner of the socket.
v Do not use excessive force when you press the microprocessor into the
socket.
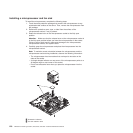
1 Orientation indicators
2 Fan-sink retention lever
120 ThinkServer TS100 Types 6431, 6432, 6433, and 6434: Hardware Maintenance Manual