


3
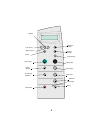
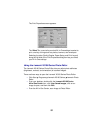
Understanding the operator panel
The operator panel buttons help you scan, copy, fax, and customize
documents. A light indicates whether or not the All-In-One is on, and a
display features the All-In-One status, messages, and menus. You can
press and hold any button to scroll through a list of options on the display.
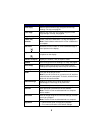
The table on page 5 shows what each button does.
Note: Button functions (except Stop/Clear) are disabled
during printing, copying, and scanning.
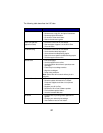
Use the: When you want to:
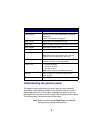
Display Check the status of the All-In-One.
Operator panel Operate your All-In-One (attached to a computer or
unattached).
For more information, see page 4.
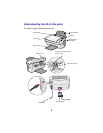
Paper exit tray Stack paper as it exits the All-In-One.
Paper guide Make sure paper feeds correctly into the All-In-One.
Paper support Load paper in the All-In-One.
Power supply Supply power to the All-In-One.
Scanner lock Lock or unlock the scanner.
Note: Unlock the scanner before use. Lock the
scanner if you are moving your All-In-One.
Scanner support Keep the scanner unit open to change cartridges,
unlock the scanner, or lock the scanner.
Scanner unit • Change cartridges.
• Unlock the scanner.
• Lock the scanner.
Note: Lift the scanner unit to do these things.
Top cover Place an item on or remove an item from the
scanner glass.
USB cable Connect your All-In-One to a computer.