


8
Section 2
Hardware Installation
Section 2 Hardware Installation
9
2.1. Hardware Installation Guide
Before you start please verify that all parts are included according to the package contents
listed previously.
Please prepare the required amount of KVM Computer Access Modules and UTP cables to
connect to your computers/servers.
If you want to install the KVM Switch in a 19” server rack please attach the enclosed 19” rack
mount brackets using the screws provided.
If you intend to install the optional KVM over IP module then please install it into the
module slot before you connect the servers and the power supply to the KVM Switch.
You may also wish to attach one of the information labels supplied with the KVM over IP
module to the back (or the front) of the KVM Switch so that you can easily locate the IP
modules MAC address.
In addition to the computers/servers to be connected you will need a PS/2 keyboard, monitor
and PS/2 mouse to use as a local console.
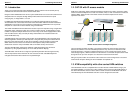
Cascading / Daisy chaining of multiple KVM Switches
You can integrate up to 8 KVM Switches in one KVM daisy chained installation with up to a
maximum of 256 attached computers.
To connect an additional slave KVM Switch to the MASTER (or previous) KVM switch use a
standard daisy chain KVM cable as mentioned above. Connect it to the Daisy Chain OUT port
of the MASTER KVM switch and to the Daisy Chain IN port of the first slave KVM switch. To
connect the second slave KVM switch connect the Daisy Chain OUT port of the first slave
KVM switch to the Daisy Chain IN port of the second slave KVM switch. Repeat this step up to
a maximum of 8 KVM switches with a maximum of 256 servers.
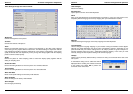
1. Switch off all the computers to be attached.
2. Connect the keyboard, monitor and mouse directly to the ports of the LINDY KVM
Switch labelled Local Console.
3. Now connect the servers and computers to the ports labelled 1 to 32 using UTP
cable of appropriate length and an appropriate Computer Access Module.
4. Attach the power supply to the KVM Switch. Switch on your monitor.
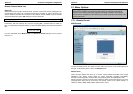
To set up and configure the KVM over IP remote access modules please refer to section
4 of this user manual.
You may also refer to the printed Quick Start Guide supplied with the KVM over IP
module.