


Section 3 KVM Switch Operation
12
+
+
3.1.3. Computer / Port Selection
You can select the computer you want to access in one of two different ways:
Keyboard hotkey selection
On screen display menu selection
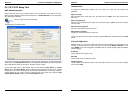
3.1.4. Illuminated front display
The front display has a two digit display to show the number of the KVM switch in the cascade:
01: Master, 02: first slave, 03: second slave. In addition one LED per Port shows the status of
the connected port:
GREEN (solid): the computer on this port is powered (switched on or soft off with 5V active)
GREEN (blinking/flickering): this port is currently selected, displayed on the monitor, and
keyboard/mouse commands are sent to the computer attached to this port.
Dark: No computer connected or computer not powered up / no 5V signal active
One red Power LED near the bank display shows if the KVM Switch is powered up.
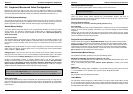
3.2. Keyboard Hotkey Selection and OSD Commands
Press the following key combination to enter the OSD menu:
(Factory Default Hotkey is Scroll Lock; it can be changed via the OSD configuration)
Within 2 seconds
With a small delay the OSD pops up on your monitor and you can use the cursor keys to
navigate through the OSD and select functions by pressing the Return key.
Alternatively, instead of waiting for the OSD, you can press the initial Scroll Lock hotkey twice
and add further direct keyboard hotkey commands within 2 seconds after the initial hotkey to
switch computer ports directly or change the KVM Switch CAT-32 settings etc.
Further available direct hotkey commands:
Command Action
↑
(Cursor up) /
↓
(Cursor down)
Select next higher/lower port
Page Up / Page Down Select next higher/lower bank/KVM switch
H + { Scroll / Num / Caps / ESC / F12 } Change primary hotkey
0101 ………… 0832 Bank + port number direct selection
T OSD port info screen on/off
Z Remote console on/disabled
S Start Autoscan
=
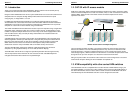
On Screen Display Menu
In most cases you can select ports via the OSD
display or via the keyboard hotkey commands
Space bar
Scroll
Lock
Scroll
Lock
Section 3 KVM Switch Operation
13
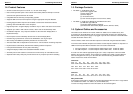
Main OSD Menu
F1 Setup
OSD Menu
Video Setting Main Menu
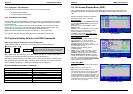
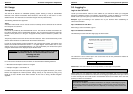
3.3. On Screen Display Menu (OSD)
The On Screen Display menu provides a lot of information about the switch configuration and
the attached computers, and offers advanced administration and full KVM Switch control to the
user.
Activate the OSD by the hotkey sequence:
Scroll Lock + Scroll Lock + space bar
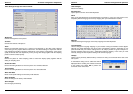
Main OSD Menu
Select computer/port: use Up/Down Arrow key to
navigate, Page Up/Page Down to scroll page, hit
Enter to select.
Edit computer name: just hit Insert to edit and
Enter to confirm.
F2: Save - Save all modifications you have made.
When pressing F2, you will see the message--
"Saving parameters" for confirmation.
F1: Setup - rotate through Main/ Video Setting/
Setup/ Status OSD menu pages
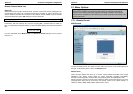
Setup OSD Menu
Auto logout: specify the timeout before an auto-
logout (00~99 min, +1 min) is performed
OSD Timeout: specify timeout for OSD menu
remaining on screen (00~99 sec, +5 sec)
AutoScan period: Specify the delay time for auto
scan (00~99 sec, +5 sec)
Title bar: Specify the title bar position
(Left/Right/Disable)
Hotkey: specify the hotkey preceding sequence
(SCROLL LOCK, CAPS, F12 or NUM LOCK)
Password: Enable/Disable password protection
Enable /Disable Remote Console: Toggle the
remote console On/Off. If the remote console is in
OFF state, a message will remind you appearing
under the OSD title bar, Remote control disabled
Always press F2 to save any changes!
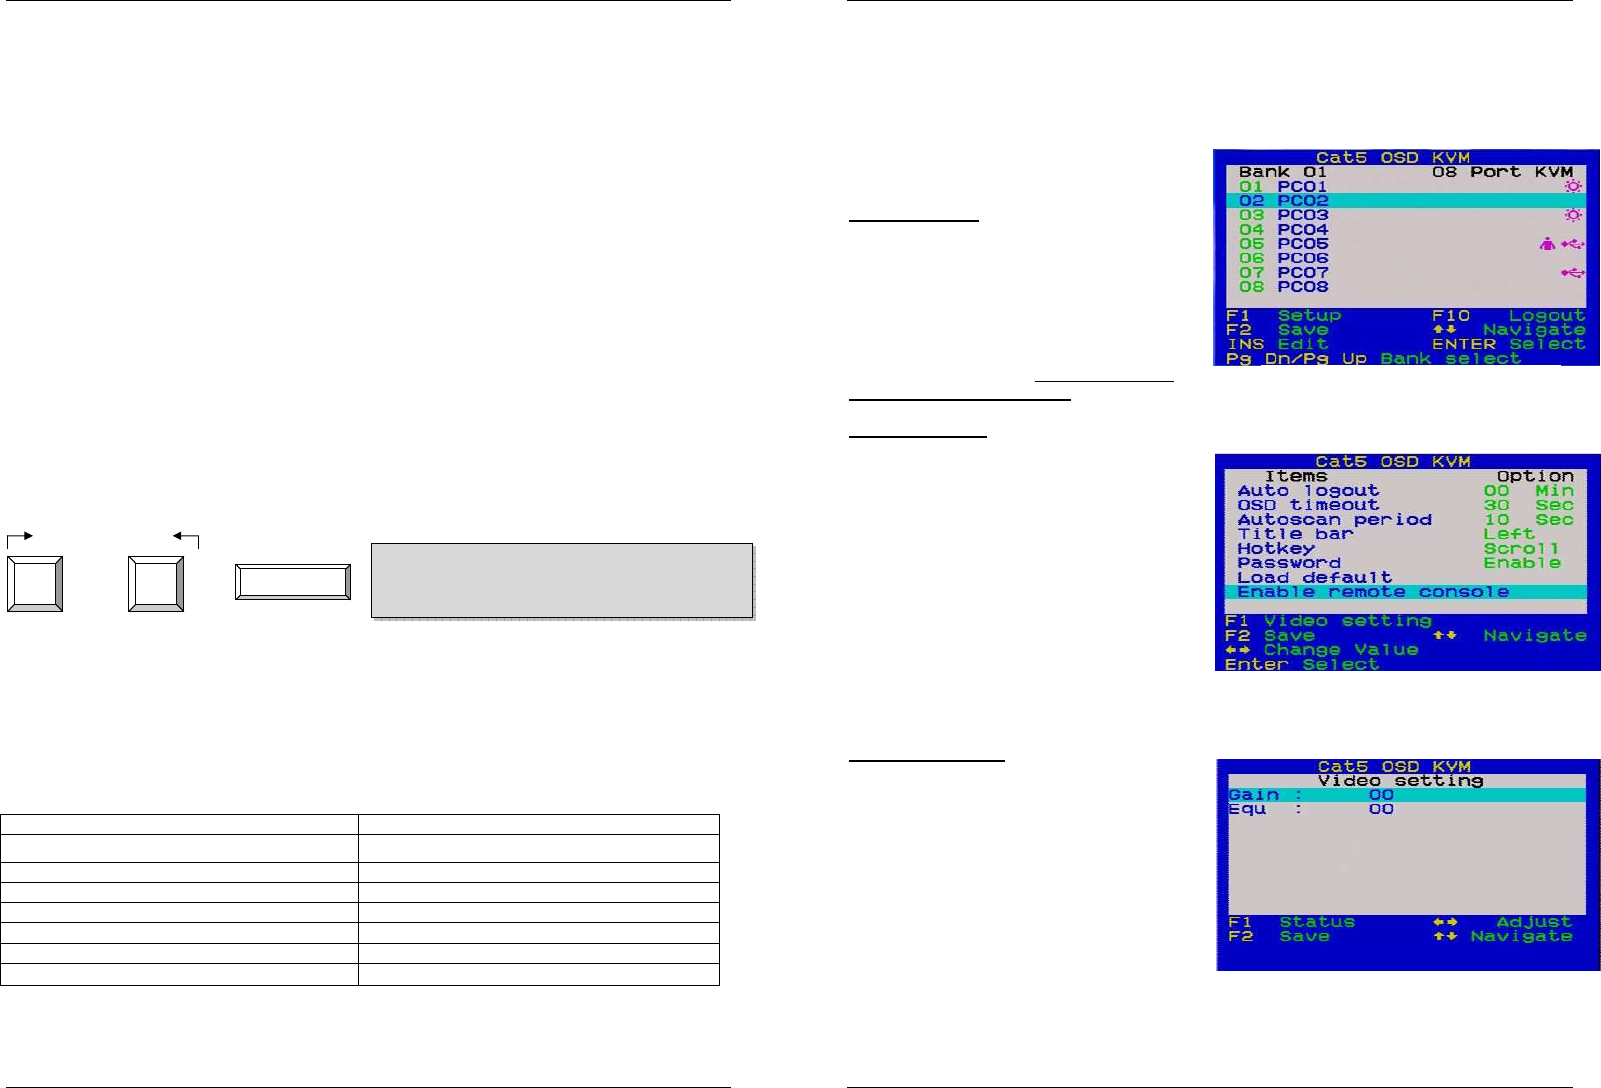
Video setting Menu
Allows you to adjust video settings individually for
every port:
Gain: specify level of gain. (00 ~ 50)
Equ: specify level of equalization. (00 ~ 50)
Go to Main/Video setting, and then begin to adjust
the video parameters such as gain/equalization.
Start with equalization to adjust the sharpness and
shadows followed by gain for the brightness. It may
be necessary to try several different settings and
combinations to achieve the best display. Always
press F2 to save any changes!