


Getting Started with Base Only Systems 12 000001630
MaxAttach NAS 6000 Getting Started
Getting Started with Base Only Systems
14: First Log On From MaxNeighborhood Discovery and Setup Wizard
10/16/01 -- Revision 2.0.03
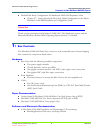
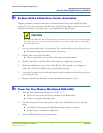
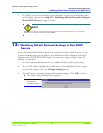
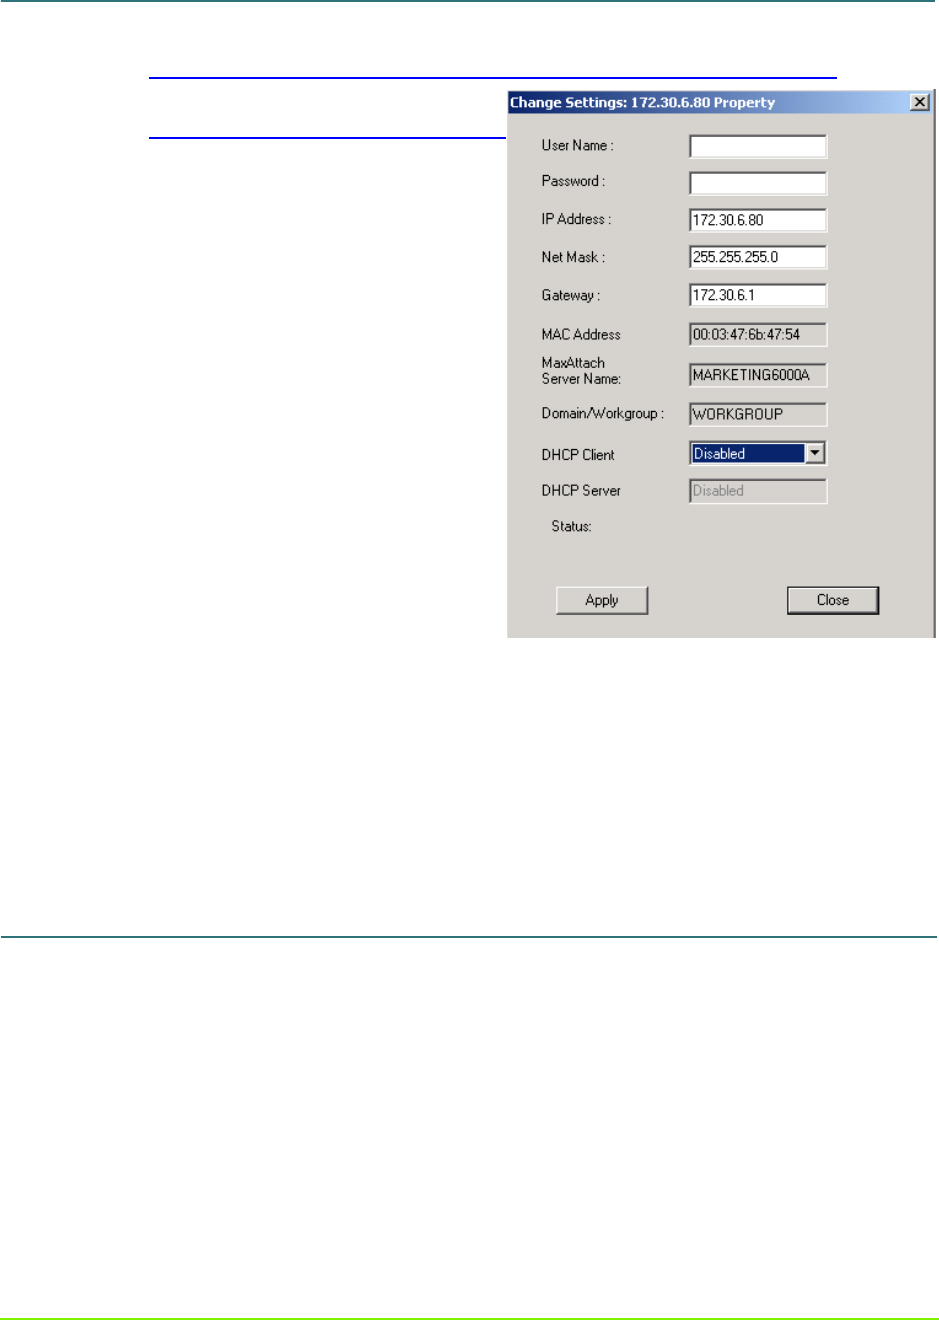
Figure #5 MaxNeighborhoor Change
Setting Screen with DHCP Disabled
4. Delete the default IP Address and
enter your unique address, subnet
mask, and gateway (if applicable).
5. Optionally, you can also change the
default computer name MaxAttach
Server Name with any combination
of alpha-numeric characters (without
spaces).
6. Then change the DHCP Client
setting by clicking the down arrow
and highlighting Disabled.
7. Next, click Apply to make the
changes permanent.
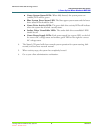
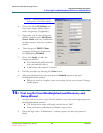
n Your MaxAttach NAS 6000 will
now automatically reboot.
n A full reboot takes about 4.5 minutes.
8. End this procedure by selecting the Close button.
9. After your MaxAttach has rebooted, press the Refresh button in the main
MaxNeighborhood window.
n When the search is complete, your new settings and nw server name if changes
should appear.
14: First Log On From MaxNeighborhood Discovery and
Setup Wizard
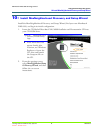
1. Double-click on the server name (factory default or your new name) appearing in the
MaxNeighborhood window.
n The default server name will begin with the letters “MA”.
n Your web browser will launch and display a login screen.
2. Enter the login name “Administrator” (without quotes) and leave the password
blank.