ISA Server 2004 Configuration Guide 116
Configuring the SecureNAT Client
The SecureNAT client configuration is simple. The only requirement is that the machine be
configured with a default gateway that routes Internet-bound requests through the ISA Server
2004 firewall machine. There are two primary methods you can use to configure a machine as
a SecureNAT client:
• Manually configure the TCP/IP settings on the machine
• Create a DHCP scope option that assigns the default gateway address
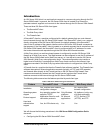
In the scenarios discussed in this ISA Server 2004 Configuration Guide, the domain
controller is configured as a SecureNAT client. Network servers such as domain controllers,
DNS servers, WINS servers and Web servers are typically configured as SecureNAT clients.
The domain controller has been manually configured as a SecureNAT client.
In chapter 4 of this ISA Server 2004 Configuration Guide, you installed a DHCP server and
created a DHCP scope. The DHCP scope was configured with a scope option assigning
DHCP clients a default gateway address that is the Internal interface of the ISA Server 2004
firewall. The default configuration of Windows systems is to use DHCP to obtain IP
addressing information.
If you are using the network configuration described in Chapter 1 of this ISA Server 2004
Configuration Guide, the Internal network client is configured with a static IP address. In the
following walkthrough, we will configure the Internal network client to use DHCP to
demonstrate how DHCP works, then return the client to its static IP address.
Perform the following steps to configure the Windows 2000 machine as a DHCP client and
return the machine to a static IP address:
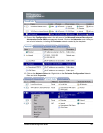
1. At the CLIENT machine, right click on the My Network Places icon on the desktop and
click Properties.
2. In the Network and Dial-up Connections window, right click on the Local Area
Connection entry and click Properties.
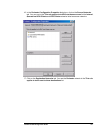
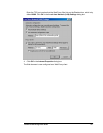
3. In the Local Area Connection Properties dialog box, click on the Internet Protocol
(TCP/IP) entry and click Properties.
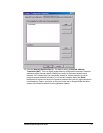
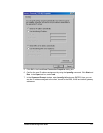
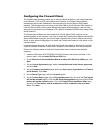
4. In the Internet Protocol (TCP/IP) Properties dialog box, select Obtain an IP address
automatically and Obtain DNS server address automatically. Click OK.


