2. In the Internet Information Services (IIS) Manager console, expand the computer name
in the left pane of the console. Right click the Default SMTP Virtual Server and click
Properties.
3. In the Default SMTP Virtual Server Properties dialog box, click the Access tab.
4. On the Access tab, click the Relay button in the Relay restrictions frame.
5. In the Relay Restrictions dialog box, confirm that the Only the list below option is
selected. Then click Add.
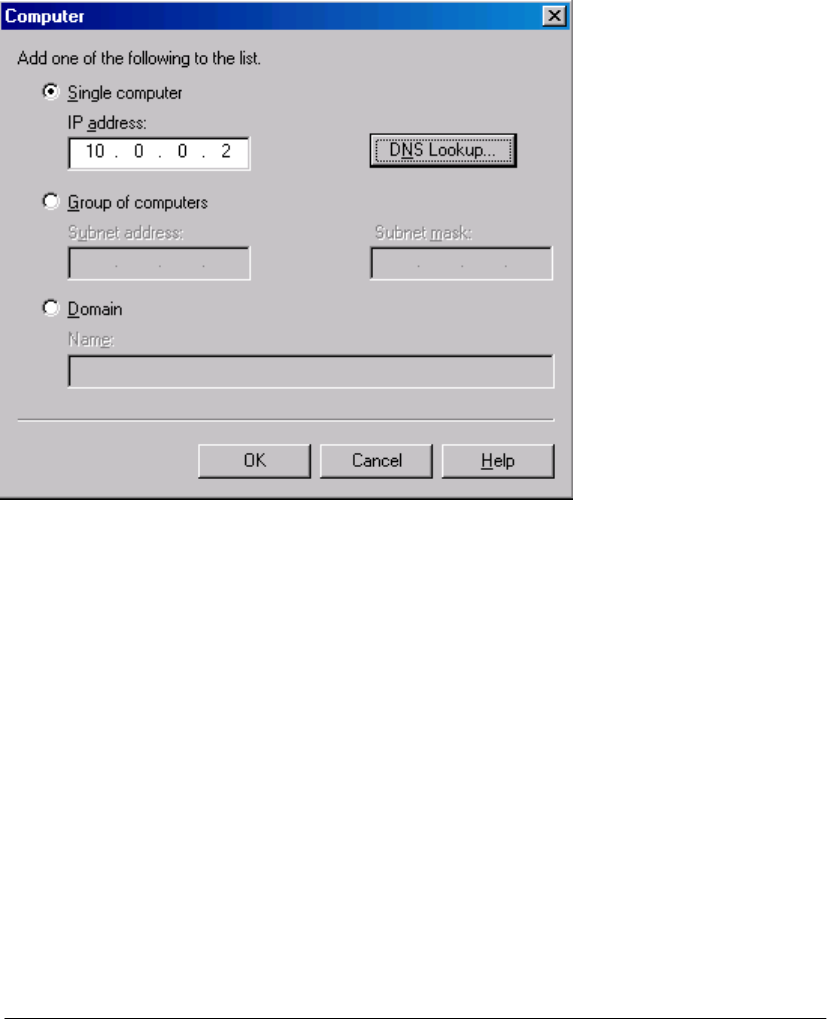
6. In the Computer dialog box, select the Single computer option and enter the IP address
of the Exchange Server in the IP address text box. In this example the IP address of the
Exchange Server is 10.0.0.2. Click OK.
7. Click OK in the Relay Restrictions dialog box.
8. Click Apply and OK in the Default SMTP Virtual Server Properties dialog box.
9. Expand the Default SMTP Virtual Server node in the left pane of the console and right
click the Domains node. Point to New and click Domain.
10. On the Welcome to the New SMTP Domain Wizard page, select Remote and click
Next.
11. On the Domain Name page, enter the domain hosted on the Internal network in the
Name text box. This is the domain that you want the SMTP relay on the ISA Server 2004
firewall to accept incoming mail from Internet SMTP servers. In this example, the Internal
network domain is msfirewall.org, so enter that. Click Finish.
12. Double click on the msfirewall.org domain in the right pane of the console.
13. In the msfirewall.org Properties dialog box, place a checkmark in the Allow incoming
mail to be relayed to this domain check box. Select Forward all mail to smart host.
Enter the IP address of the Exchange Server on the Internal network in the text box,
enclosed in straight brackets. In our current example, the IP address of the Exchange
Server on the Internal network is 10.0.0.2, so we will enter [10.0.0.2]. Click Apply and
OK.
ISA Server 2004 Configuration Guide 189


