


EN-8
20
AUTO POSITION
OFF
ON
VOLUME
16:9/4:3
COMPUTER
GAMMA
VIDEOCOMPONENTDVI-D(HDCP)
POWER
MENU
SELECT
DVD VIDEO
MEMORY
1
2
3
4
5
6
7
8
9
19
18
17
16
15
14
13
12
11
10
CineFocus
COLOR TEMP
ENTER
A.P.
DVI COMP
VIDEO
PC
GAMMA
C.T.
MENU
C.F.
ASPECT
3
2
1
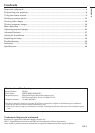
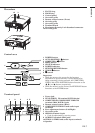
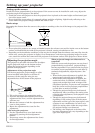
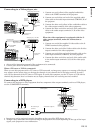
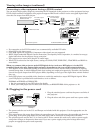
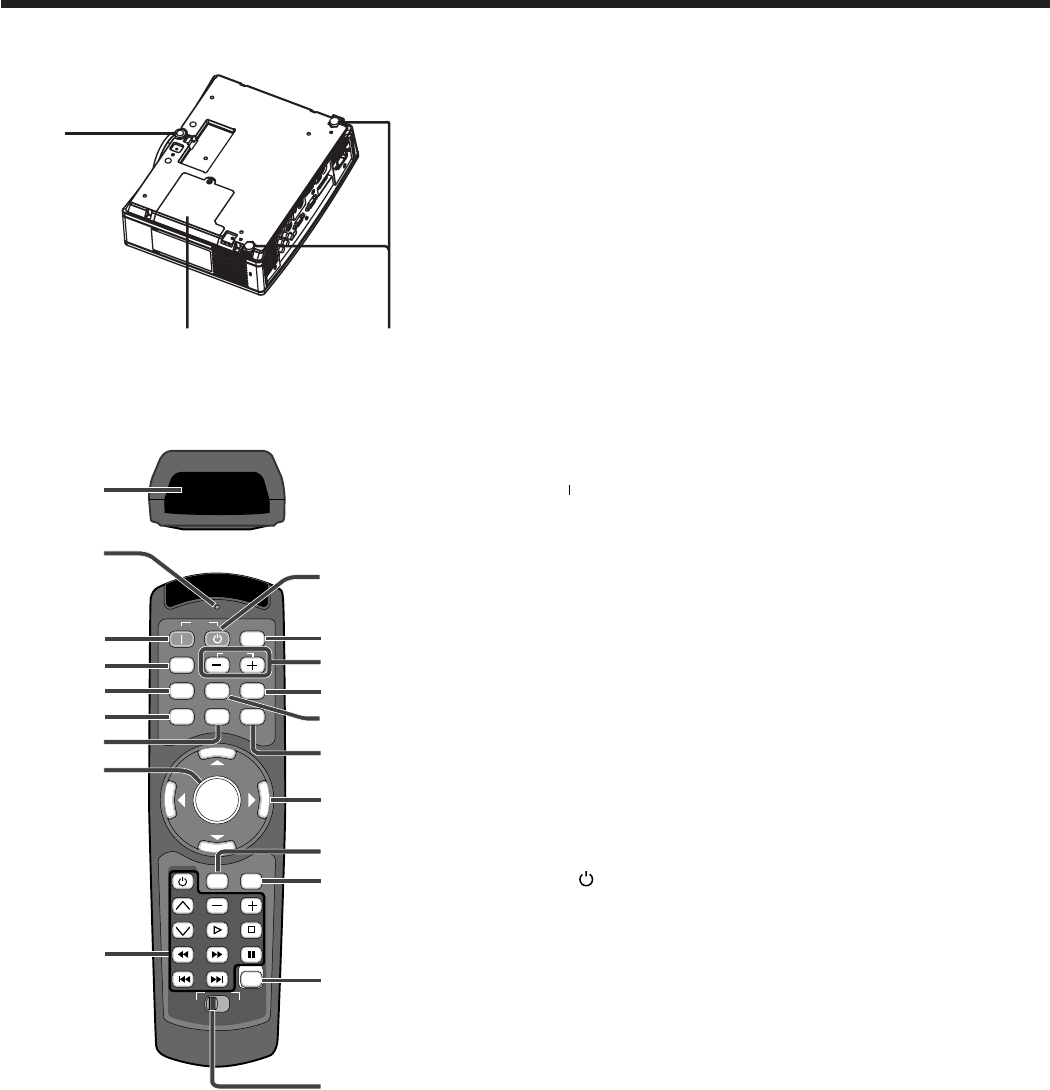
Preparating your projector (Continue)
Bottom side
1 Adjustment foot (Front)
2 Lamp cover
3 Adjustment feet (Rear)
Caution:
Do not replace the lamp immediately after using the
projector because the lamp would be extremely hot
and it may cause burns.
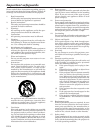
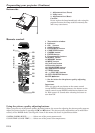
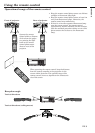
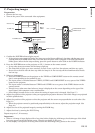
Remote control
1 Transmission window
2 Indicator
3 ON ( ) button
4 16:9/4:3 button
5 DVI-D(HDCP) button
6 COMPUTER button
7 GAMMA button*
8 ENTER button
9 Programmable buttons
10 SELECT switch
11 MEMORY button
12 MENU button
13 CineFocus button
14 Direction buttons
15 COLOR TEMP button*
16 COMPONENT button
17 VIDEO button
18 -, + (VOLUME) buttons
19 AUTO POSITION button
20 OFF ( )button
* : See the below for the picture quality adjusting
buttons.
Important:
When you press the any button on the remote control
(except ENTER and direction buttons), the buttons on the
remote control (except ENTER and direction buttons) are
lit. Wait approx. 15 seconds after releasing the button to
turn them off.
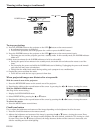
Using the picture quality adjusting buttons
When you press any of the picture quality adjusting buttons, the screen for adjusting the picture quality appears.
Adjust the picture quality by pressing the % and $ buttons. The picture quality adjustment can be made alter-
natively in the IMAGE menu. (See Page 22.) Items in the menus are shown in parentheses below.
GAMMA (GAMMA MODE) .............. Selects one of the preset gamma mode.
COLOR TEMP (COLOR TEMP.) ..... Selects one of the preset color temperatures.