


UC-7420/7410 User’s Manual Managing Communication
4-10
NAT
NAT (Network Address Translation) protocol translates IP addresses used on one network
different IP addresses used on another network. One network is designated the inside network and
the other is the outside network. Typically, UC-7420/7410 connects several devices on a network
and maps local inside network addresses to one or more global outside IP addresses, and un-maps
the global IP addresses on incoming packets back into local IP addresses.
NOTE Click on the following link for more information about iptables and NAT:
http://www.netfilter.org/documentation/HOWTO/NAT-HOWTO.html
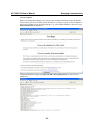
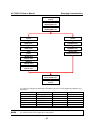
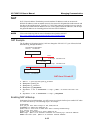
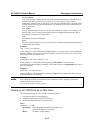
NAT Example
The IP address of all packets leaving LAN1 are changed to 192.168.3.127 (you will need to load
the module ipt_MASQUERADE):
UC-7420
PC1 (Linux or Windows)
IP/Netmask:
Gateway:
192.168.3.100/24
192.168.3.127
PC2 (Linux or Windows)
IP/Netmask:
Gateway:
192.168.4.100/24
192.168.4.127
LAN1
LAN2
LAN1:ixp0 192.168.3.127/24
LAN2:ixp1 192.168.4.127/24
NAT Area / Private IP
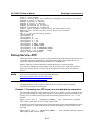
1.
#ehco 1 > /proc/sys/net/ipv4/ip_forward
2.
#
modprobe iptable_nat
3.
#
modprobe ip_conntract
4.
#
modprobe ipt_MASQUERADE
5.
#iptables -t nat –A POSTROUTING –o ixp0 –j SNAT --to-source 192.168.3.127
or
6.
#iptables –t nat –A POSTROUTING –o ixp0 –j MASQUERADE
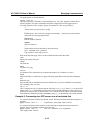
Enabling NAT at Bootup
In the most of real world situations, you will want to use a simple shell script to enable NAT when
UC-7420/7410 boots up. The following script is an example.
#!/bin/bash
# If you put this shell script in the /home/nat.sh
# Remember to chmod 744 /home/nat.sh
# Edit the rc.local file to make this shell startup automatically.
# vi /etc/rc.d/rc.local
# Add a line in the end of rc.local /home/nat.sh
EXIF=‘ixp0’ #This is an external interface for setting up a valid IP address.
EXNET=‘192.168.4.0/24’ #This is an internal network address.