


Phone/IP Starter Config. MultiVOIP FX Quick Start Guide
26
Phone/IP Starter Configuration
Full details here:
MVPFXS-24
MVPFXS-16
MVPFXS-8
Technical Configuration chapter
in User Guide
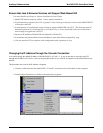
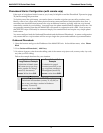
1. Open a browser and go to the IP Address of the MVPFXS unit (default IP is 192.168.2.1). In the sidebar
menu, click Configuration.
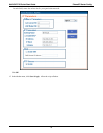
2. Go to Configuration | IP. Enter or alter any IP Parameters, as needed. Click OK.
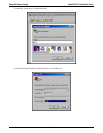
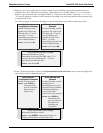
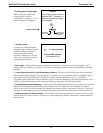
3. Go to Configuration | Voice/Fax. Select Coder | “Automatic.” At the right-hand side of the dialog box,
click OK. If you know any specific parameter values that will apply to your system, enter them. Click
Copy Channel. Select Copy to All. Click Copy. At main Voice/Fax Parameters screen, click OK to exit
from the dialog box.
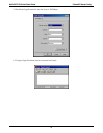
4. Enter telephone system information. Go to Configuration | Interface. Enter parameters obtained from
phone company or PBX administrator. Click OK.
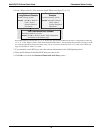
5. Go to Configuration | Regional Parameters. Select the Country/Region that fits your situation. Click
OK and confirm. Click OK to exit from the dialog box.
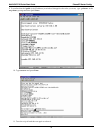
6. Go to Configuration | Logs/Traces.
Select “Enable Console Messages.” Click OK.
To do logging with a SysLog client program, click on “SysLog Server – Enable” in the Logs/Traces screen.
To implement this function, you must install a SysLog client program. For more info, see the “SysLog
Server Functions” section of the “Operation & Maintenance” chapter of the
User Guide.
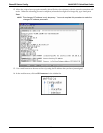
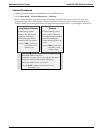
7. Go to Save &Apply. Click OK. This will save the parameter values that you have just entered.
The MultiVOIP’s “BOOT” LED will light up while the configuration file is being saved and loaded into
the MultiVOIP. Don’t do anything to the MultiVOIP until the “BOOT “LED is off (a loss of power at this
point could cause the MultiVOIP unit to lose the configuration settings you have made).
END OF PROCEDURE.