


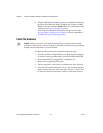
Chapter 2 PCI Serial Hardware Installation, Verification, and Configuration
Serial Hardware and Software for Windows 2-20 ni.com
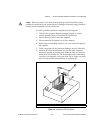
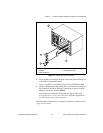
7. Screw the PCI serial board mounting bracket to the back panel
mounting rail of the computer.
8. Replace the cover.
9. Turn on your computer and start Windows NT.
The hardware installation is complete. Continue to the next section, Verify
the Installation.
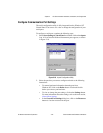
Verify the Installation
To verify the hardware and software installation, complete the following
steps:
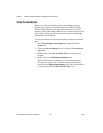
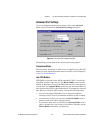
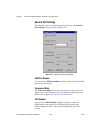
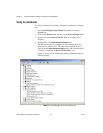
1. Determine which physical port is associated with COMx, as follows:
a. Select Start»Settings»Control Panel and double-click on the
niports icon.
A list of installed National Instruments ports with their logical
COMx names appears. If your interface is not on this list, refer to
Appendix D, Troubleshooting and Common Questions.
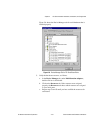
b. Select the COM port that you want to verify and click on the
Settings button.
The General Port Settings dialog box displays the serial number
of the serial hardware and the physical port number starting at 1.
For all serial hardware, PORT1 refers to the top port, PORT2
refers to the next port down, and so on.
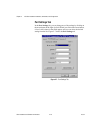
2. Run the diagnostic utility, as follows: select
Start»Programs»National Instruments Serial»diagnostics.
The diagnostic utility verifies that your serial driver is installed
properly, that the configuration of your hardware does notconflict with
anything else in your system, and that the serial driver can
communicate with your hardware correctly.
If the test is successful, your serial hardware and software are installed
properly. If the test fails, refer to Appendix D, Troubleshooting and
Common Questions, to troubleshoot the problem.
3. After you verify the hardware and software installation, connect the
cables. See Appendix A, Connector Descriptions, for information
about cable connections.