


Chapter 5 AT Serial Hardware Installation, Verification, and Configuration
© National Instruments Corporation 5-5 Serial Hardware and Software for Windows
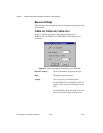
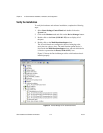
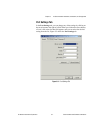
5. Verify the hardware resources, as follows:
a. In the Device Manager under Multi-function adapters,
double-click on a serial board.
b. ClickontheResources tab. If the resources were assigned
properly, the Resources tab shows which resources are assigned
to your serial ports.
c. Repeat steps 5a and 5b until you have verified the resources for
each board.
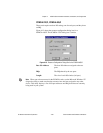
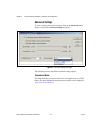
6. (Optional) To determine which physical port isassociated with COMx,
note the Port 1, Port 2, etc. entries next to the COM numbers. For all
serial hardware, PORT1 refers to the top port, PORT2 refers to the next
port down, and so on.
7. Run the diagnostic utility, as follows: select Start»Programs»
National Instruments»NI-Serial»Diagnostics.
The diagnostic utility verifies that your serial driver is installed
properly, that the configuration of your hardware does notconflict with
anything else in your system, and that the serial driver can
communicate with your hardware correctly.
If the test is successful, your serial hardware and software are installed
properly. If the test fails, refer to Appendix D, Troubleshooting and
Common Questions, to troubleshoot the problem.
8. After you verify the hardware and software installation, connect the
cables. See Appendix A, Connector Descriptions, for information
about cable connections.
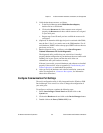
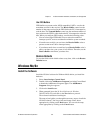
Configure Communication Port Settings
The serial configuration utility is fully integrated into the Windows 2000
Device Manager. You can use it to view or change the configuration of
your serial ports.
To configure a serial port, complete the following steps:
1. Select Start»Settings»Control Panel and double-click on the
System icon.
2. ClickontheHardware tabandclickontheDevice Manager button.
3. Double-click on the Ports (COM & LPT) icon.