75
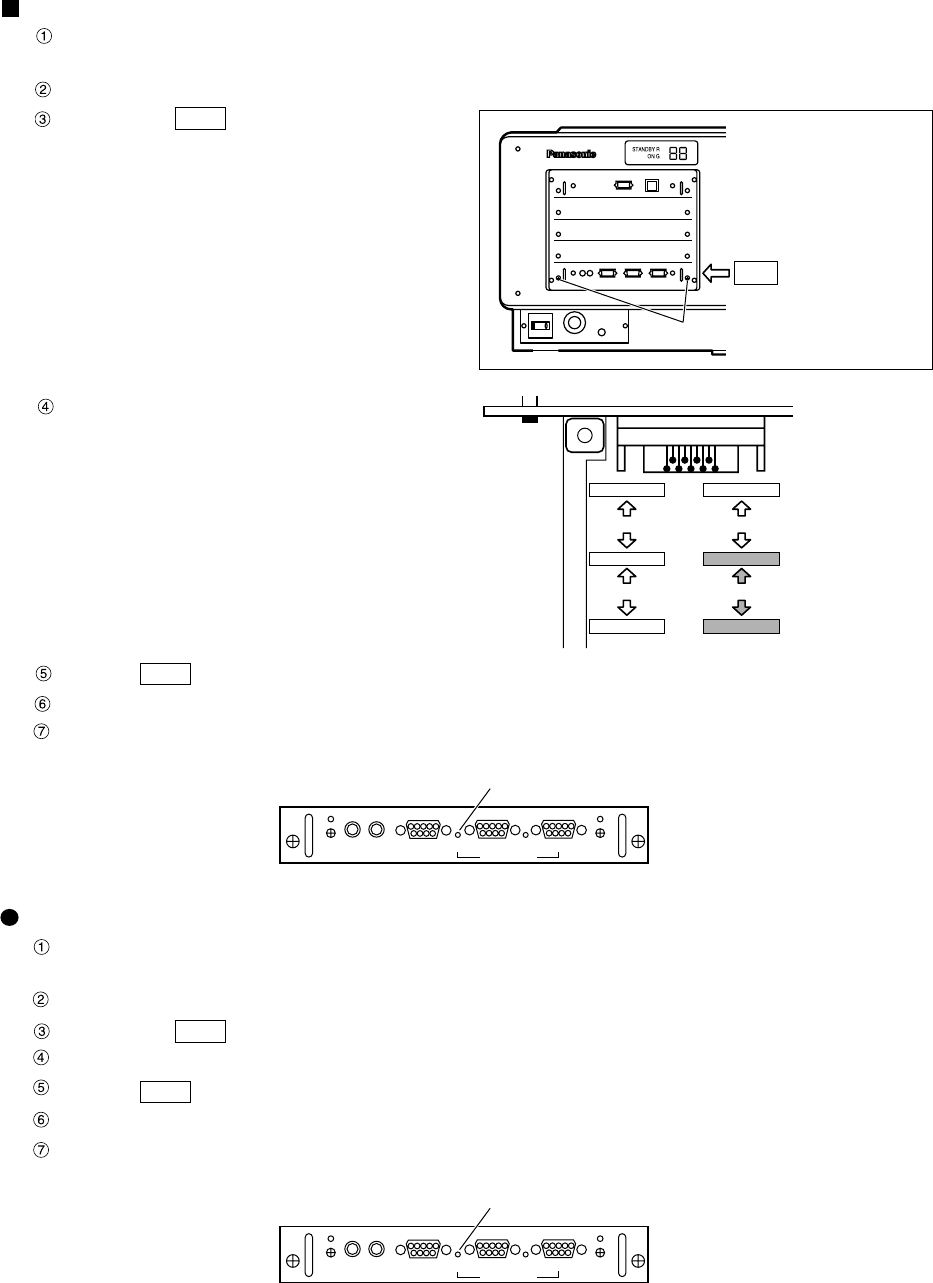
Selecting the RS-422 Serial Interface
Refit the CPU module.
Plug the projector into the wall outlet and set the front MAIN POWER switch to ON.
Check that the LED to the left of the RS-232C-IN port is lit red.
CM
Remove the connector that connects CM5 to
CM6, then use the same connector to connect
CM6 to CM7.
Converting the RS-232C-IN port into an RS-422-IN port
If the projector power is ON, turn it OFF by pressing the remote-control (or on the projector) POWER
key, and wait for approximately 5 minutes until the cooling fan stops.
Set the front MAIN POWER switch of the projector to OFF, then unplug the projector from the supply outlet.
Remove the CPU module.
CM
Restoring the original RS-232C-IN port function
If the projector power is ON, turn it OFF by pressing the remote-control (or on the projector) POWER
key, and wait for approximately 5 minutes until the cooling fan stops.
Set the front MAIN POWER switch of the projector to OFF, then unplug the projector from the supply outlet.
Remove the CPU module.
Remove the connector that connects CM6 to CM7, then use the same connector to connect CM5 to CM6.
Refit the CPU module.
Plug the projector into the wall outlet and set the front MAIN POWER switch to ON.
Check that the LED to the left of the RS-232C-IN port is lit green.
CM
CM
Remove the 2 screws.
CPU module
CM
IN
IN
IN OUTOUT
REMOTE IN2
REMOTE IN1
RE232C/RS422
RS232C(G)
RS422(R)
RS232C(G)
RS422(R)
LED indicator
IN
IN
IN OUTOUT
REMOTE IN2
REMOTE IN1
RE232C/RS422
RS232C(G)
RS422(R)
RS232C(G)
RS422(R)
LED indicator
CM8
RS-232C-OUT
RS-422-OUT
CM9
CM10
CM5
RS-232C-IN
RS-422-IN
CM6
CM7
JST JEY-9S-1A3F


