


OnSite System Installation 32
OnSite Series Getting Started Guide 3 • Installation Overview
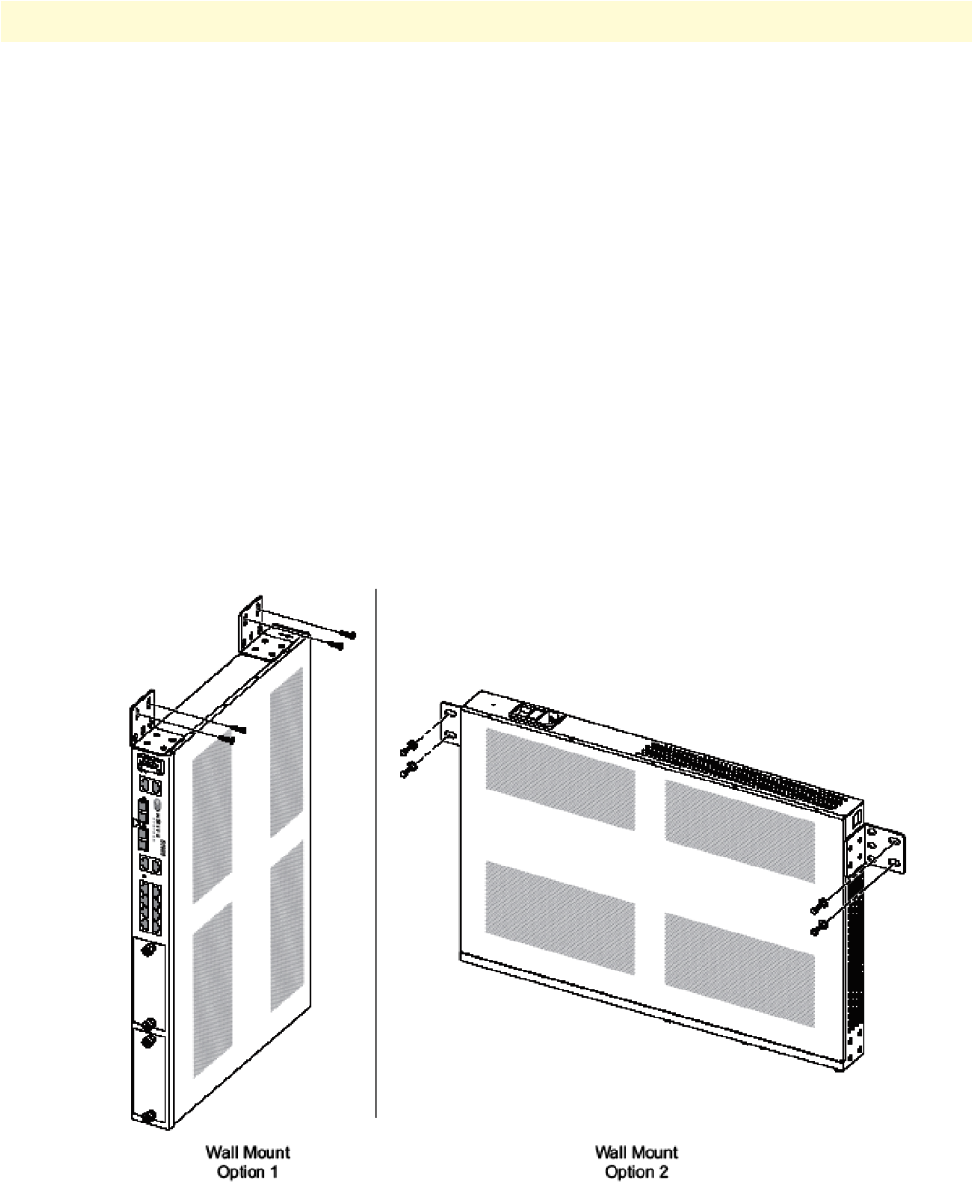
Mounting the Chassis on the Wall
Note When choosing a wall-mounting location, consider the cable limita-
tions and the wall structure. Use the four L brackets provided for rack
mounting to mount the chassis on a wall. The brackets provide the
most stable installation for the chassis.
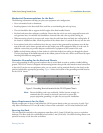
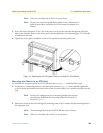
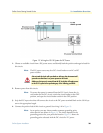
1. Install the two L mounting brackets in the orientation shown in Figure 12. Insert and fully tighten the
screws to secure the brackets to the chassis (four screws for each bracket). Use a suitable screwdriver for this
task.
Note For this rack configuration, the L mounting bracket holes are flush
with the bottom panel of the OS-10 system chassis.
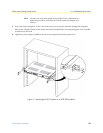
2. Position the chassis against the wall using wall mount option 1 or option 2, as shown in Figure 12.
3. Secure the chassis to the wall using four 12-24 x 3/4-inch screws (two screws for each side) through the
elongated holes in the L bracket nearest to the chassis. Use a suitable screwdriver for this task.
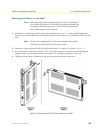
4. Tighten any loose captive installation screws on the expansion slot front panel covers.
Figure 12. Mounting the OS-10 System Chassis on a Wall