


The following settings/adjustments follow a slightly different procedure or may need some
further explanation.
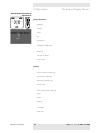
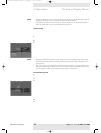
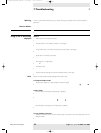
Zoom/Magnification
‘Zoom’ is used to enlarge a part of the picture.
1 Press Menu.
– The menu bar appears on the screen.
2 Use Cursor Control to select ‘Zoom’ in the Features menu.
3 Use the Cursor Control to adjust the Zoom factor in the ‘Magnification’ slider
(4x, 9x or 16x).
4 Press OK to confirm and exit the menu.
5 Use Cursor Control to select another section of the enlarged area (‘Panning’).
Pressing the Zoom button on the remote control, will immediately bring up the Magnification slider
(step 3). Pressing the Zoom button 4 times in succession will switch off the Zoom function.
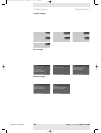
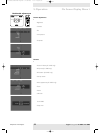
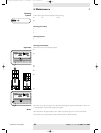
Picture in picture (PIP) - LC 6285 only
‘PIP’ enables projection of a second picture in the currently projected picture.
1 Press Menu.
– The menu bar appears on the screen.
2 Use Cursor Control to select ‘PIP’ in the Features menu.
3 Use Cursor Control to select ‘On’.
– The PIP window will appear on the screen.
4 Use PIP source on the remote control to select the source from which you wish to project
the picture in the PIP window.
If you select ‘Auto’ the system will check if a source is available. If a source is found then its
picture will be projected.
– The picture of the selected source will be projected in the PIP window.
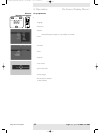
5 Press Menu and select ‘Features’ in the menu bar.
6 Use Cursor Control to move to ‘PIP format’ and select the required PIP window size
(‘Small’,‘Medium’ or ‘Large’).
7 Use Cursor Control to move the cursor to ‘PIP location’ and press OK.
8 Use Cursor Control to select the required position of the PIP window and confirm with OK.
Examples
Note
Philips Home Cinema Projector 34 English User guide LC 6281 / LC 6285
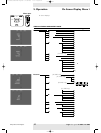
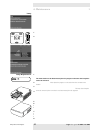
5. Operation On Screen Display Menu >
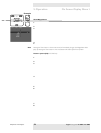
MENU
PICTURE SIZE – PICTURE SIZE +
VOLUME +
VOLUME –
SOURCE
OK
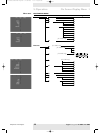
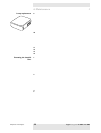
MENU
PICTURE SIZE – PICTURE SIZE +
VOLUME +
VOLUME –
OK
SOURCE