


Pitney Bowes DA500/DA550 Operator Guide 3-5
DA500/DA550 Basics • 3
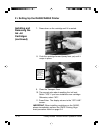
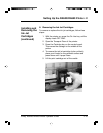
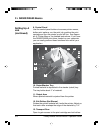
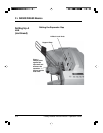
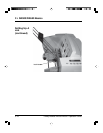
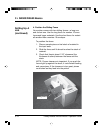
2. Input Area
Where you stack material for printing. You'll make most
setup adjustments in this general area.
3. Interface Panel (Not Shown)
Located on the lower part of the rear cover, the panel has
the ON/OFF switch, parallel cable connector and power
cord receptacle.
4. Wire Frame
Supports the material stack. Adjust the feed angle to
accommodate the weight of the material you're running.
Adjust its side-to-side position so it's centered under the
stack.
5. Feed Ramp and Lock Knob
The feed ramp adds a gentle slope to the stack to help
feeding. Lower the feed ramp until the top of the bottom
piece in the stack reaches the middle of the feed ram.
Secure the feed ramp with the lock knob.
6. Wireframe Slide
Slides the wireframe side to side. Lock in position with the
lock lever (Item 7).
7. Wireframe Slide Lock Lever (Not Shown)
Locks the wireframe slide in position.
8. Feed Fence
Helps confine the stack. Adjust to the width of your
material plus 1/16" clearance.
Setting Up A
Job
(continued)