7.9 System Configuration
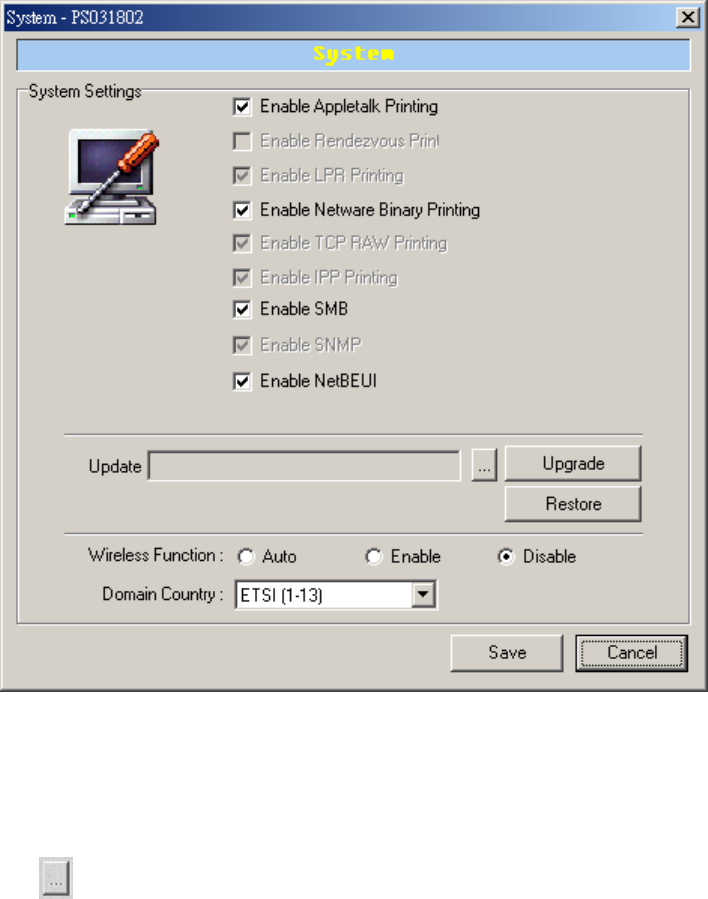
Double Click “System” icon and the System configuration window will pop-up.
In the System configuration page, you can select to enable/disable each printing protocol, assign
name for each printer port of this print server and upgrade the new firmware for this print server.
Upgrade Firmware: You can use this “Upgrade” tool to update the newest firmware of the print
server. Click
button and select the correct firmware in you PC’s storage. After selecting the
firmware file, click the “Upgrade” button and wait for finish the firmware update process. If you
want to reset the Print Server to default factory settings, please click “Restore”.
Wireless Function: You can select “Enable” or “Disable” to manually enable or disable the
wireless function. If you manually enable wireless function, the print server wireless interface will
be always enabled and Ethernet interface will always disabled, and vice versa. You also can
select “Auto” to let the print server automatically decide to enable or disable the wireless function.
The print server only can work in either Ethernet or Wireless interface. It cannot work in both
interface at the same time. When the print server starts up, it will auto-detect the LAN port is
connect to a network device or not. If the print server is connected to an active network by
Ethernet cable when starting up, the print server will run with Ethernet interface. If the print server
LAN port is not connected when starting up, the print server will run with wireless interface. This
setting is “Disable” in default.
Domain Country: Please select the suitable Domain of your country for wireless operation.
