


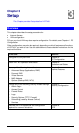

Setup
9
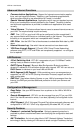
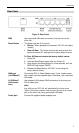
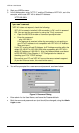
Configure or use any of the following:
• PC Database
• Remote Admin
• Routing (RIP and static Routing)
• Upgrade firmware
• Enable/Disable UPnP Support
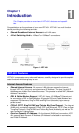
Chapter 9:
Other Features and Set-
tings
Where use of a certain feature requires that
PCs or other LAN devices be configured, this
is also explained in the relevant chapter.
Configuration Program
VRT-401 contains an HTTP server. This enables you to connect to it, and configure it,
using your Web Browser. Your Browser must support JavaScript. The configuration
program has been tested on the following browsers:
• Netscape V4.08 or later
• Internet Explorer V4 or later
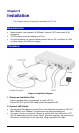
Preparation
Before attempting to configure VRT-401, please ensure that:
• Your PC can establish a physical connection to VRT-401. The PC and VRT-401
must be directly connected (using the switch ports on VRT-401) or on the same
LAN segment.
• VRT-401 must be installed and powered ON.
• If VRT-401’s default IP Address (192.168.0.1) is already used by another device,
the other device must be turned OFF until VRT-401 is allocated a new IP Address
during configuration.
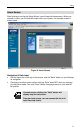
Using UPnP
If your Windows system supports UPnP, an icon for VRT-401 will appear in the system
tray, notifying you that a new network device has been found, and offering to create a
new desktop shortcut to the newly-discovered device.
• Unless you intend to change the IP Address of VRT-401, you can accept the
desktop shortcut.
• Whether you accept the desktop shortcut or not, you can always find UPnP de-
vices in My Network Places (previously called Network Neighborhood).
• Double - click the icon for VRT-401 (either on the Desktop, or in My Network
Places) to start the configuration. Refer to the following section Config Wizard for
details of the initial configuration process.
Using your Web Browser
To establish a connection from your PC to VRT-401:
1. After installing VRT-401 in your LAN, start your PC. If your PC is already running,
restart it.