


28 English
Advanced Configuration
Advanced Configuration
This section gives you more detailed information about various projector
setup, peripheral connection, and projector usage issues.
Installing a
Custom Startup
Logo
You can create a custom startup logo, save it as a standard 16-color
Windows bitmap (BMP) file, and install it in projector memory. You use
the Startup Logo item on the Features menu to replace the default logo
displayed during projector startup with the custom logo. Use the
LOADLOGO.EXE program, on the Polaview 330 Tools diskette included
with the projector, to download a custom logo to the projector.
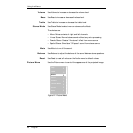
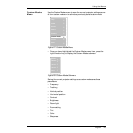
To install a custom startup logo:
1 Connect an RS232 cable to the projector’s RS232 connector and to the
computer serial port.
2 Start the LOADLOGO.EXE program.
3 Select a communications port from the on-screen menu.
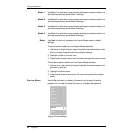
4 Click on the Download menu on the menu bar.
5 Click on Custom Logo.
6 Select the directory in which the custom logo is stored, and click on
Open.
The LOADLOGO.EXE program installs the custom startup logo in
projector memory.
If you need LOADLOGO.EXE, visit Polaroid’s web site
(www.polaroid.com/service/sfwdownload/index.html).
Configuring the
Remote Mouse
Windows 95 comes with standard serial or PS/2 mouse drivers that may
not be compatible with the projector’s remote mouse. These drivers are
most likely to be compatible with the Polaview 330 LCD projector:
• Microsoft serial mouse
• Microsoft PS/2 port mouse
• Logitech serial mouse
• Logitech PS/2 port mouse.
To change to a Microsoft or Logitech mouse driver:
Note: The Windows and menu choices that different manufacturers use
sometimes vary greatly in appearance. The procedure below may
not apply to all situations.
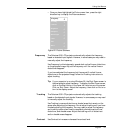
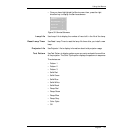
Windows 95 1 Click on the Start button in the lower left-hand corner of the Windows
95 screen. Highlight Settings, and select Control Panel.
2 Double-click on the Mouse icon.