


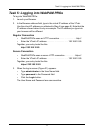


Task 6: Creating Logical Drives
15
there is free capacity remaining, you can specify another logical drive now or wait
until later.
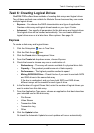
For Modular Server, create six logical drives. Name them LD1
through LD6.
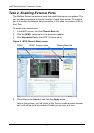
9. Enter an alias for the logical drive in the field provided.
10. Choose a RAID level for the logical drive from the dropdown menu.
The choice of RAID levels depends the number of physical drives you
selected.
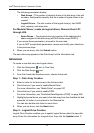
11. RAID 50 and 60 only – Specify the number of axles for your array.
For more information on axles, see “RAID 50 Axles” on page 245 or “RAID
60 Axles” on page 248.
12. Specify a Capacity and the unit of measure (MB, GB, TB).
This value will be the data capacity of the first logical drive in your new disk
array. If you specify less than disk array's maximum capacity, the remainder
will be available for additional logical drives which you can create later.
13. Specify a Stripe size from the dropdown menu.
64 KB, 128 KB, 256 KB, and 1 MB are available. 64 KB is the default.
14. Specify a Sector size from the dropdown menu.
512 B, 1 KB, 2 KB, and 4 KB are available. 512 B is the default.
15. Specify a Read (cache) Policy from the dropdown menu.
Read Cache, Read Ahead Cache, and No Cache are available. Read Ahead
is the default.
16. Specify a Write (cache) Policy from the dropdown menu.
Write Back and Write Through (Thru) are available. Write Back is the default.
17. From the Preferred Controller ID dropdown menu, choose a controller.
The choices are Controller 1 or 2, or Automatic. This feature is only available
on subsystems with two controllers and LUN Affinity enabled.
18. Click the Update button.
A new logical drive is displayed under New Logical Drives.
Repeat the above steps to specify additional logical drives as desired.
19. When you are done specifying logical drives, click the Next button.
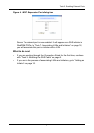
Step 3 – Summary
The Summary lists the disk array and logical drive information you specified.
20. To proceed with disk array and logical drive creation, click the Submit
button.
The new disk array appears in the Disk Array List the Information tab.