


39
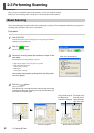
2. Creating 3D Data
4
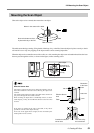
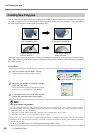
Click the [ ] button.
The mode for specifying the rescanning area is canceled.
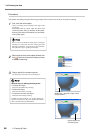
5
Drag to verify the area to rescan.
The specified rescanning area is displayed as a three-di-
mensional form.
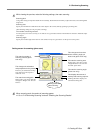
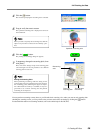
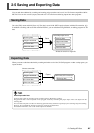
6
Click the [ ] button.
The [Settings for Scanning] dialog box appears.
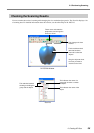
7
If necessary, change the scanning pitch, then
click [Scan].
Here, none of the settings except for the scanning pitch
can be changed. It is also not possible to set a different
scanning pitch for each area.
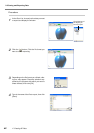
This executes
rescanning.
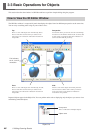
Specified rescanning area
These set
scanning pitch.
Rescanning
area
When you want to respecify the rescanning area, click the
object at any location to release the area already speci-
fied.
Setting the Scanning Pitch
When performing rescanning, make the setting for the
scanning pitch as fine as possible. This increases the num-
ber of scanning points, enhancing the degree of comple-
tion. When little free memory is available, it may be a
good idea to use a narrow scanning area and perform
rescanning in several passes.
You can perform rescanning as many times as you like after basic scanning. Also, when you want to redo scanning after
checking the scanning results, you can go back to the previous state before rescanning by clicking the [ ] button.
For detailed information on rescanning methods, refer to the online help for Dr. PICZA3.
2-4 Finishing the Data