


Chapter 10 - Using The CLI Shell
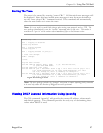
Starting The Trace
The trace is be started by entering “trace<CR>”. All historical trace messages will
be displayed. Since this may include many messages it may be more desirable to
use the “trace clear<CR>” command instead. This command will automatically
clear the trace buffer as it starts the trace.
Note:
It is very useful to enable link changes when testing some protocols such as STP. The
trace package automatically resets the “seconds” timestamp when a link rises. This makes it
convenient to “zero in” on the actions taken immediately after a link becomes active.
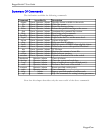
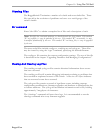
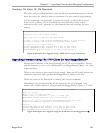
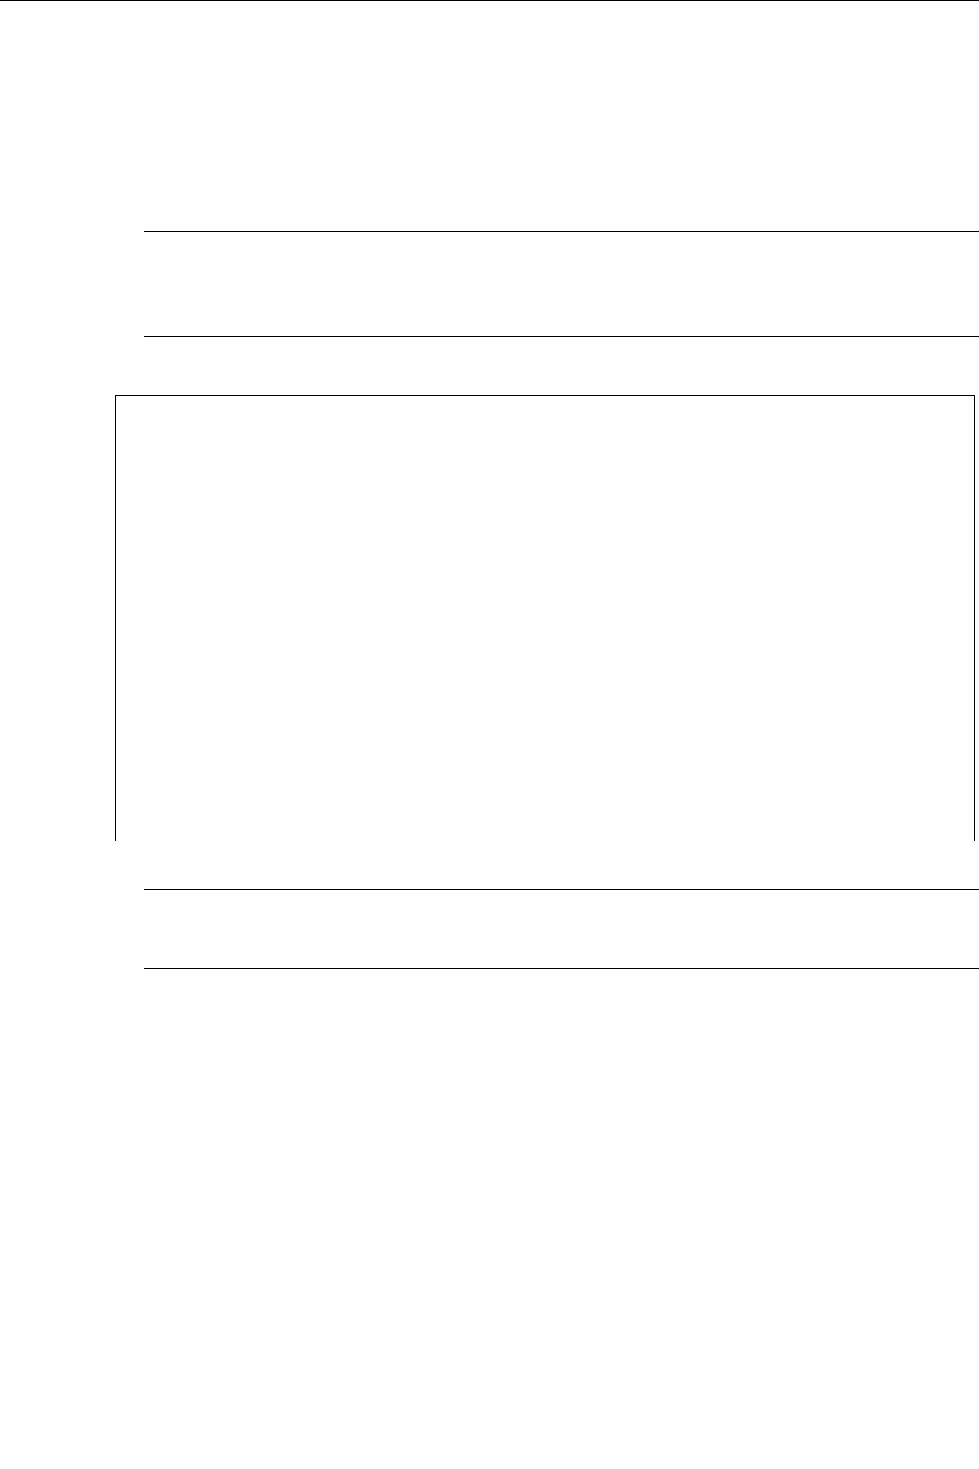
Figure 65: Starting A Trace
Note:
The trace package includes the “forward” subsystem, a remote reporting facility intended
to be used only under the direction of RuggedCom service personnel.
>trace stp - all
STP : Logging is disabled
>trace stp decodes
STP : Logging decodes
>trace stp port 7
STP : Logging decodes on port(s) 7
> trace link changes
LINK : changes
>trace
Log has been cleared
009.445 IGMP TX General Query, VLAN 1, gr. 000.000.000.000,
to ports ALL VLAN PORTS
010.543 LINK Link 7 has risen.
000.550 RSTP TX port 7 RST BPDU: TCack 0 agg 1 lrn 0 fwd 0 role DP prop 1 TC 0
root 32768/0adc001000 cst 38, brdg 32768/0adc005000, prt 128/7
age 2.00, maxage 20, hello 2, fwddelay 15 V1Length 0
000.557 RSTP RX port 7 RST BPDU: TCack 0 agg 1 lrn 0 fwd 0 role DP prop 1 TC 0
root 32768/0adc004000 cst 0, brdg 32768/0adc004000, prt 128/14
age 0 00 maxage 20 hello 2 fwddelay 15 V1Length 0
Viewing DHCP Learned Information Using Ipconfig
The CLI command “ipconfig” will provide the current IP address, subnet mask
and default gateway. This command provides the only way of determining these
values when DHCP is used.
RuggedCom
97