


Operation
Runco CL-810 Series Owner’s Operating Manual 57
PRE
L
IMINAR
Y
To adjust the horizontal and vertical position of the OSD, select OSD Position and press
ENTER. Then, press the
or button to select Horizontal or Vertical and use the
or button to adjust.
PC & HD Adjust: Use the settings in the PC & HD Adjust menu to fine-tune 480p and
higher-resolution signals for optimum picture quality.
•Auto: Adjusts the phase, frequency and position automatically.
•Freq. Adjusts the frequency of the signal.
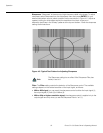
•Phase: Adjust the phase if the image (usually from an RGB source) shows shimmer or
“noise.” Pixel phase adjusts the phase of the pixel sampling clock relative to the
incoming signal. The effect of this control is similar to that of a tracking control on a
VCR.
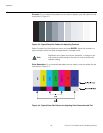
For best results, use a good test pattern such as a smooth gray consisting of a clear
pattern of black and white pixels, or a similar “half on, half off” graphic image. (You may
find that you can stabilize the image at more than one point. Use either setting in this
case.)
•H. Pos.: Adjusts the horizontal position of the image.
•V. Pos.: Adjusts the vertical position of the image.
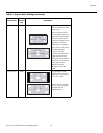
PIP/PBP Set Up (not available when used with the SDC-1): Select PIP/PBP Set Up
from the Option menu to change the PIP/PBP settings.
• PIP/PBP Enable: Press the or button to select PIP/PBP Enable, then press
ENTER. Press the or button to select Off or On, then press ENTER.
•PIP Set Up: Press the or button to select PIP Set Up, then press ENTER. Press
the or button to select PIP Off, Graphic in Video or Video in Graphic, then press
ENTER.
•PBP Set Up: Press the or button arrows to select PBP Set Up, then press
ENTER. Press the or button to select PBP Off, Graphic by Video or Video by
Graphic, then press ENTER.
DNR: Use the or button to adjust the Digital Noise Reduction (DNR). DNR is useful
for clearing up noisy images from interlaced SD sources. Adjust as desired, keeping in
mind that reducing noise (which reduces high frequencies) may also soften the image.
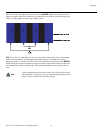
To adjust the image position with a 480i source, use the Image
Shift controls in the Set Up menu (see page 59).
Note