74
Chapter 5 Network Capture
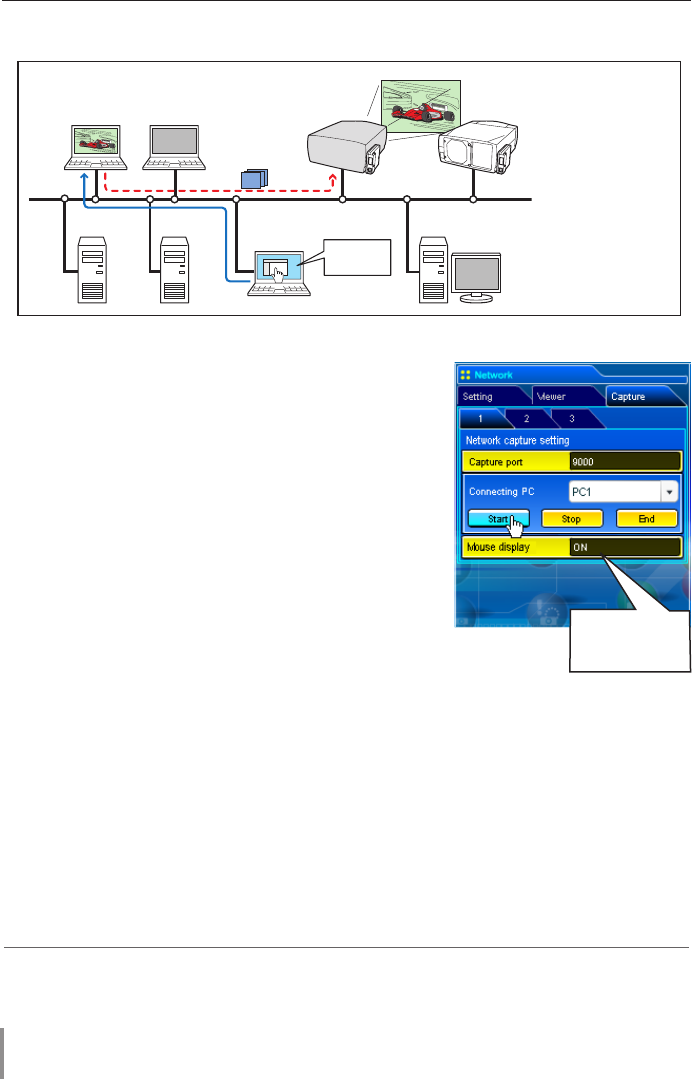
Select input mode to "Network" previously.
1 Access to the control page of the projector by using
the web browser. From the Network menu, click
Capture tab to display the setting page (+ p.37).
2 Select the computer number from the pull-down
menu button of "Connecting PC" and click Start but-
ton. The screen image of the selected computer will
appear on the projected screen in real time.
• To stop capturing, click Stop button. The captured
image of the computer on the screen is frozen.
• To restart capturing, click Restart button.
3 To end capturing, click End button.
✐ The IP address of the connecting PC should be registered previously (+ p.72).
✐ If the error message appears, check item "Parameter set up" (+ p.71).
✐ You can use the capture function by using the web browser or the projector if the Network
Capture 3 software is installed into the computer correctly and its icon stays on the task bar.
PC4PC3 PC6
Capture
PC5
PC2
* PC provides the Network Capture.
PJ2
PJ1
PC1
Project a screen
image of PC1 with
PC2.
* Start capturing of
the PC1 from the
PC5.
[2] Control by the web browser
Set "On" when
using the wireless
mouse function


