OUTPUT TERMINALS
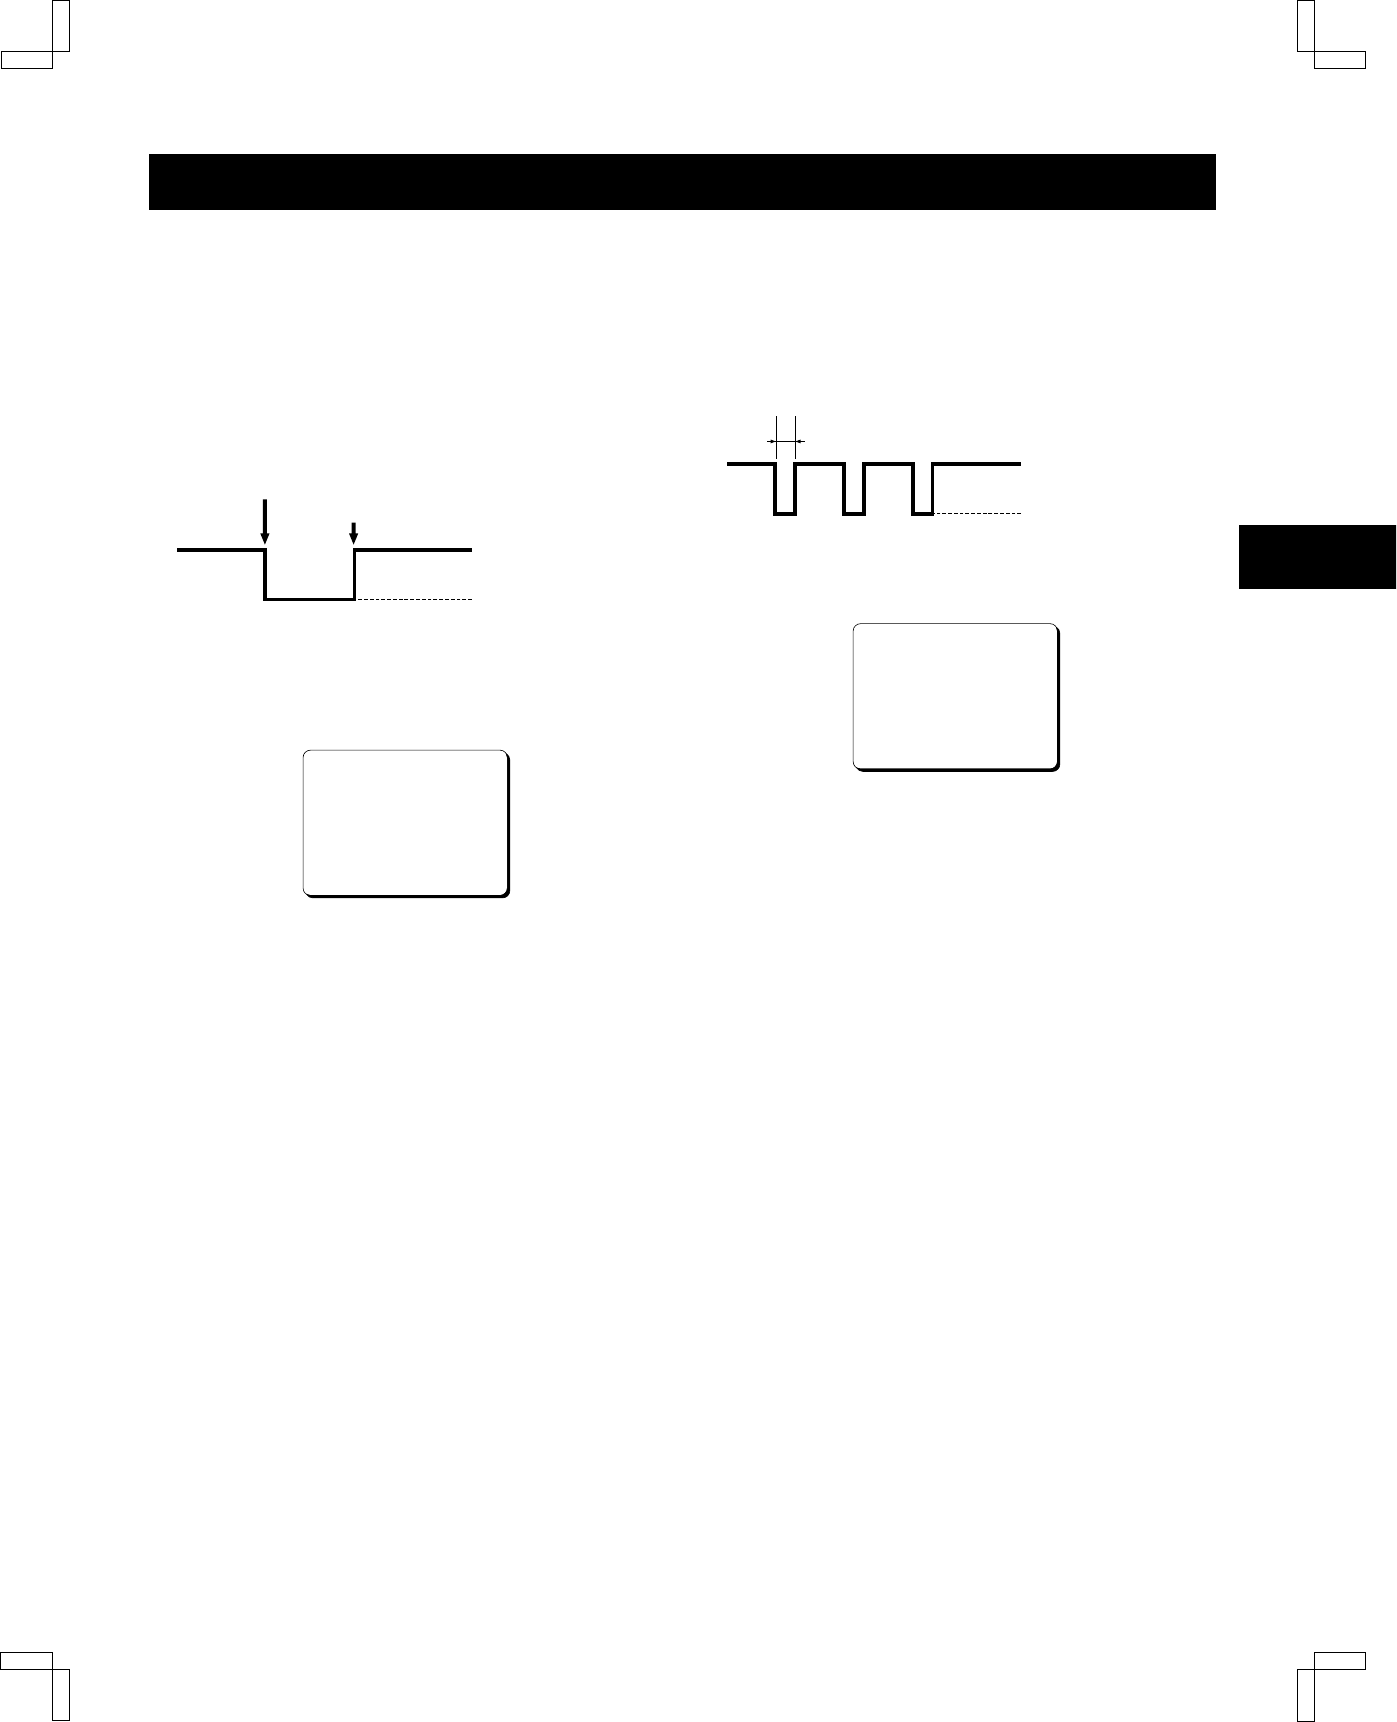
TAPE END OUT Terminal
•
During recording, when the end of the tape is reached
or when the tape counter reading indicates 7 hours 57
minutes or more, the output becomes 0V (Low).
•
To reset the output, press the STOP or EJECT button.
•
During autorepeat recording, when the end of the tape
is reached, the output becomes 0V (Low) for about 2
seconds only.
TAPE END OUT Terminal Output Setting
1 Press the MENU button until the (SET UP 3) menu is
displayed.
@@@@@@@<SET@UP@3>
*ALARM@MODE@@@@@@@Y1
*ALARM@SPEED@@@@@@8H
*ALARM@DURATION@@@20S
*VERTICAL@SYNC@@@@Y
*EXT@TIME@ADJ.@@@@01:00
*TAPE@IN@MODE@@@@@STOP
*TAPE@END@MODE@@@@REW
*TAPE@END@OUT@@@@@-3M
*CLOG@DETECT.@@@@@Y
*SERIES@REC@IN@@@@N
2
Press the ] button until the “TAPE END OUT” setting
is flashing.
3
Press the l (or j) button, to select the desired
output mode.
– 3M . . . . . . . . The output becomes 0 V (Low)
when the tape counter reaches
“7:57:00” and/or when the tape
reaches the end.
END . . . . . . . . The output becomes 0 V (Low)
when the tape reaches the end.
4
Press the PAUSE/SEARCH button to save the setting.
SW OUT Terminal
When recording, a pulse signal is output at the SW OUT
terminal.
This terminal is usually connected to the switch input (SW
IN) of devices like a camera switcher unit, or a quad
compressor.
SW OUT Terminal Output Setting
1 Press the MENU button until the (SET UP 4) menu is
displayed.
@@@@@@@<SET@UP@4>
*SW@OUT
@@TIMING@@@@@@@@@@FIELD
@@FIELD@@@@@@@@@@@01
@@8H@@@@@@@@@@@@@@Y
*THREAD@CHECK@@@@@Y
*VIDEO@LOSS@@@@@@@N
*REC@SPEED@@@@@@@@N
*EJECT@SET
@@EJECT@MODE@@@@@@EJECT1
@@OPERATION@@@@@@@SLAVE
2
Press the l (or j) button to set “FIELD” or “FRAME”,
then press the ] button.
FIELD . . . . . . . 1 pulse is output after each set
number of fields.
FRAME. . . . . . 1 pulse is output after each set
number of frames.
3
Press the l (or j) button to set the desired pulse
signal interval, then press the ] button.
•
If “TIMING” is set to FRAME (see step 2),
“FRAME” will be indicated instead of “FIELD”.
Available settings are:
FIELD . . . . . . . 01, 02, 03, 04, 05, 10, 30 or 60 field
FRAME. . . . . . 01, 02, 03, 04, 05, 10, 30 or 60
frame
4
Press the l (or j) button to set the desired “8H (or
6H)” mode.
•
If the “TAPE” in the (SET UP 5) menu is set to
“T-120”, “6H” will be indicated instead of “8H”.
Y. . . . . . . . . . . When recording in 8-hour (or
6-hour) mode, a pulse signal is
output.
N. . . . . . . . . . . When recording in 8-hour (or
6-hour) mode, a pulse signal is
not output.
5
Press the PAUSE/SEARCH button to save the
settings.
Tape end or 7:57:00
5V (H)
0V (L)
(Output impedance: 5.7 kΩ)
Output reset
5V (H)
0V (L)
(Output impedance: 5.7 kΩ)
FIELD: 16.7 msec.
FRAME: 5 msec.
NU4QG/NA3 (SRT-2400DC GB) Mon. Sept., 17/2001
40
English


