SECTION 2: INSTALLATION
Page 2-10 LM Basic 408e/412e Operator’s Manual
2.3 LOADING LABELS (CONT’D)
2.3.1 Loading Roll Paper
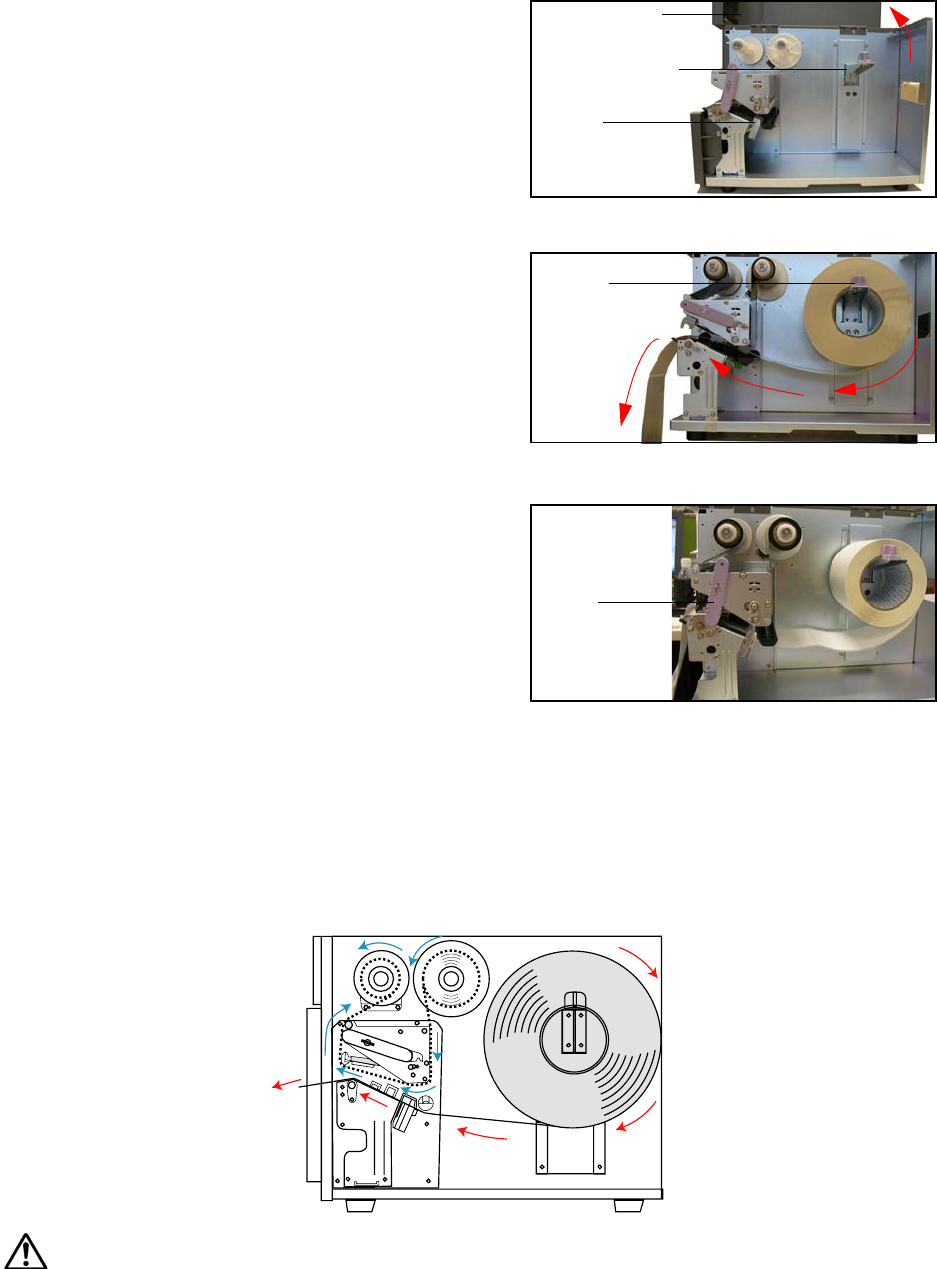
1. Lift up the main cover. Make sure that the cover is
pushed upwards until it locks firmly in place so that
it will not fall downwards and injure your hands.
Release the purple Head Lock lever by pushing it
upwards. The print head assembly will be lifted up
to allow ribbon and label loading.
2. Load the ribbon rolls as described earlier. Pull
down the Label Guide Plate. Then insert a label roll
onto the Label Holder. Push the purple Label
Stopper against the label roll to prevent it from
slipping sideways.
3. Guide the label under the ribbon, making sure it
goes under the paper sensors. The label should
emerge at a perpendicular angle from the print
head.
4. Fasten the Head Lock Lever by pushing it
clockwise until the print head locks into place. Pull up the Label Guide Plate to and push it
against the outside edge of the label to restrict and straighten the label path. Now turn the
purple Head Lock Lever clockwise to latch the print head assembly back in place.
5. The illustration below summarizes the ribbon and label loading paths for your reference.
To check whether your ribbon and label are loading correctly, perform a test print.
Caution
• When replacing paper, bear in mind that the print head and its surrounding area remain hot. Keep your fingers away from
these areas to prevent injury.
• Avoid touching even the edge of the print head with your bare hands.
Main Cover
Label Holder
Label
Guide Plate
Label
Stopper
Head
Lock lever
latched in
place


