


SETTING UP THE PRINTER
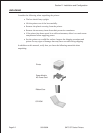
Consider the following when setting up the printer/
• Locate a solid flat surface with adequate room to set the printer. Make sure
the Power Module can be located so that the power connecting cable can be
attached to the printer and the AC Power Cable can be connected to an AC
power outlet.
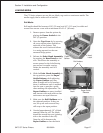
• The location should be near the host or computer terminal. The maximum
distance is:
- 10 feet for the Parallel interface. To fully utilize the capabilities of the
printer, a cable meeting IEEE 1284 specifications must be used.
- 18 feet for the optional Serial RS232 Interface.
- 10 feet for the optional USB interface without hub.
- the optional 10baseT Ethernet Interface depends upon the LAN cabling.
• For imformation on interfacing the printer to a host system, see Section 5.
Interface Specifications.
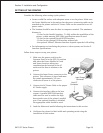
Follow these steps to set up your printer:
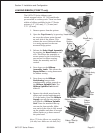
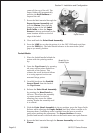
1. Make sure the power switch on the
Operator Panel is in the OFF (0) position
and place the Power Module in a safe
and secure location, taking into
consideration the location of the AC
outlet and the host in relation to the
printer.
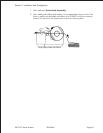
2. Connect the Input Power connector to the
printer. This connector is keyed and must
be turned approximately 3/4 turn
clockwise to secure it to the printer.
3. Connect the AC Power Cable to the proper
AC Outlet supply.
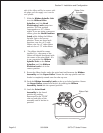
4. Connect the interface cable to the host
system. A parallel IEEE1284 interface
cable must be used to realize the high
data transfer rate of the printer’s parallel
port. If an optional interface is installed,
the appropriate cable should be used.
5. Load the ribbon and media following the instructions in this section.
6. Configure the printer for label width and operating mode using the
instructions in this section.
Host I/F
Connector
Input Power
Connector
Section 2. Installation and Configuration
SATOCT SeriesPrinters9001069A Page 2-3