43
5. Delivering Stored Scan Data by
the Network Delivery Scanner
Stored scan data can be sent to a specified destination using the network deliv-
ery scanner function. This chapter explains the various display screens, delivery
procedures, and checking of the delivery result when this function is used.
Note
❒ A delivery server in which ScanRouter V2 Lite/Professional is installed is
necessary to use the network delivery server function. Information about de-
livery destinations and senders must be programmed first into the delivery
server. Also, program a connected device in [Set I/O Device] of ScanRouter V2
Administration Utility. For more information, see ScanRouter V2 Adminis-
tration Utility Help.
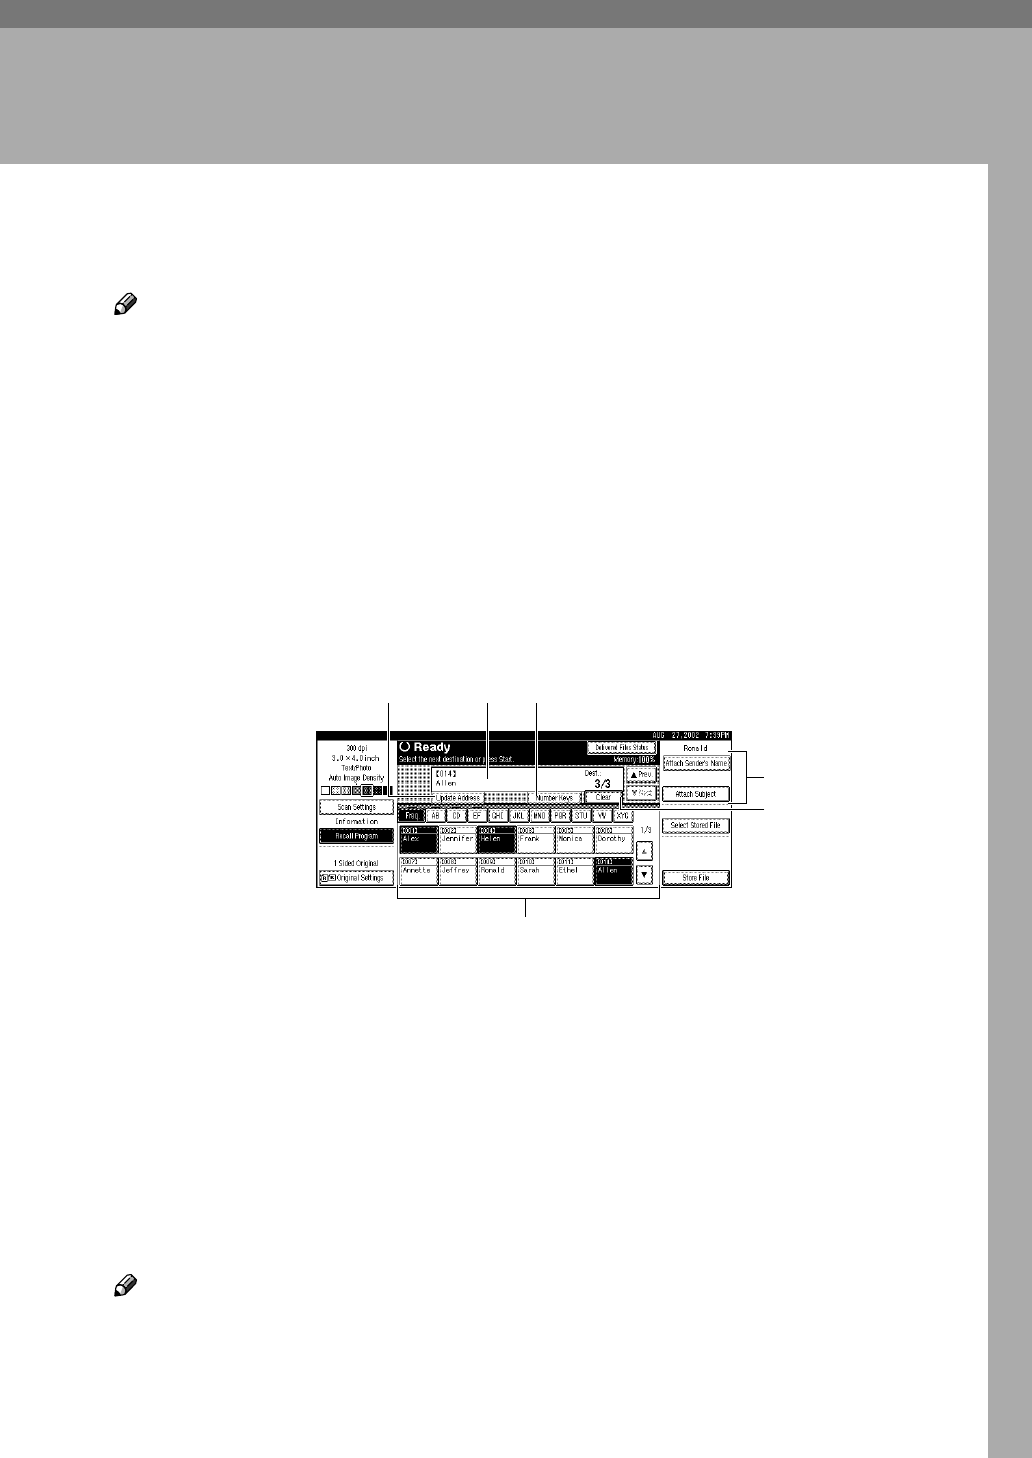
List Displays of Destinations and Senders
The display configuration when using the machine as network delivery scanner
is as follows:
1.
[Update Address]
Press this key to obtain destination infor-
mation from the delivery server and up-
date the display. If the destination is
changed in the delivery server, press the
key to update the display.
2. Destination Display
The selected destination is shown here. If
several destinations are selected, the se-
lected destinations are displayed in order
by pressing [U
UU
UPrev.] or [T
TT
TNext].
Note
❒ Pressing the {Check Settings} key lets
you verify the selected destinations.
3.
[Number Keys]
Use these to specify a destination using
the 3-digit short ID number.
4.
[Attach Sender’s Name] [Attach Sub-
ject]
Sets the sender and subject of the deliv-
ered document.
5.
[Clear]
Pressing this key clears a selection in the
Destination List or a short ID number en-
tered.
4
5
2
6
31


