


34
PRINTER/SCANNER FUNCTIONS
3
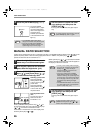
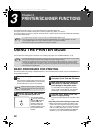
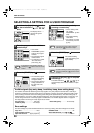
Press a [SCAN MENU] key to begin
scanning.
The display will show the
number of the [SCAN
MENU] key that you
pressed, and the number
will light and the SCAN
indicator will be blinking.
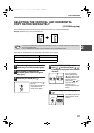
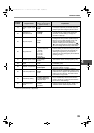
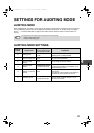
[SCAN MENU] keys and the Button Manager scan menu
The six [SCAN MENU] keys can be configured separately in Button Manager.
The factory default settings for the [SCAN MENU] keys and Button Manager are given in the table below. For
information on Button Manager settings, see the Button Manager help file.
SCANNING FROM YOUR COMPUTER
The machine supports the TWAIN standard, making it possible to scan from TWAIN-compliant applications. The
machine also supports WIA (Windows Image Acquisition), making it possible to scan from the "Scan and Camera
Wizard" in Windows XP. See the Online Manual for the procedures for TWAIN and WIA scanning. For information
on TWAIN and WIA settings, see the help file for the scanner driver or Windows Help.
12
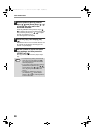
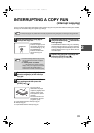
• To return to copy mode from scanner
mode, press the [SCAN] key ( ) or
[CLEAR ALL] key ( ).
• For limitations on copying and printing in
scanner mode, and scanner mode while
copying or printing, see
"OPERATION IN
COPY, PRINTER, AND SCANNER MODES".
(p.35)
• If you find it difficult to remove the original
from the document feeder tray, open the
feeding roller cover first and then remove
the original. If you remove the original
without opening the feeding roller cover, the
original may become dirty.
Note
1234 56
It is convenient to write the function selected
for each key in Button Manager above the
key.
Key position Name in display Button Manager menu Application that starts
1 (key on far left) SC1 ScanMenu SC1 Sharpdesk
2 (2nd key from left) SC2 ScanMenu SC2 Email
3 (3rd key from left) SC3 ScanMenu SC3 FAX
4 (4th key from left) SC4 ScanMenu SC4 OCR
5 (5th key from left) SC5 ScanMenu SC5 Microsoft Word
6 (key on far right) SC6 ScanMenu SC6 Filing
!Chapter3.fm 34 ページ 2004年2月5日 木曜日 午前10時45分