


Installation on Notebook PCs
Rev 3.5 Feb.05 27
On completion of this step, the modem driver is installed.
Verify that Remote Access Service is installed before
proceeding to configure your account.
Verifying that RAS is installed:
1. In the
Control Panel, double click the Network icon to open
the
Network window.
2. Click the
Services tab.
3. If
Remote Access Service is listed under Network Services, the
component is installed and you can skip to the next
section. Otherwise, proceed to step 4.
4. Click to select
Computer Browser.
5. Click the
Add…button to open the Select Network Service
window.
6. Select
Remote Access Service and click OK.
7. If the
Windows NT Setup window appears, either insert the
Windows NT CD and enter your CD-ROM drive letter, or
enter the path to the .CAB files. Click
Continue.
8. Select
COMx - Sierra Wireless AirCard 555… (where x is the
number of the COM Port you assigned to the AirCard 555)
from the drop-down menu and click
OK.
9. Verify that
Sierra Wireless AirCard 555… is displayed in the
Remote Access Setup window and click Continue.
10. Restart your PC if prompted.
On completion of this step the AirCard driver is installed.
Proceed to configure the AirCard to use your account (if it was
not pre-activated). See “Activation” on page 35.
Card insertion and removal
Inserting the AirCard
Note: If you are using
Windows NT, you must turn off
your PC whenever you insert or
eject a PC Card.
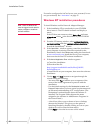
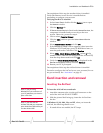
To insert the AirCard into a notebook:
1. Attach the antenna to the circular gold connector on the
end of the AirCard. DO NOT FORCE.
2. With the picture label facing up, insert the AirCard into
the slot.
Note: If you also use the
AirCard 300 with your computer,
eject the AirCard 300 before you
use the AirCard 555.
In Windows 95, 98, 2000, Me, and XP, when you insert the
AirCard, the following should occur:
• If sound effects are enabled, the PC beeps.