


Printing a Picture
16
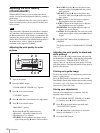
Giving Your Printer a Device
Number
When two or more printers are used in a system, it is
convenient that each printer have a device number (from
1 to 9).
1
Turn on the printer.
“Ready BT RSSI [----]” appears on the operation
display.
2
Press the MENU button.
3
Press V of the control button to display “Bluetooth
SETTING [>>].”
4
Press B of the control button.
5
Press V of the control button to display “MY
DEVICE NAME [>>].”
6
Press B of the control button.
“Sony UP-DX100 [NONE-9: EXEC]” appears.
7
Press v or V of the control button to set the device
number.
8
Press the EXEC button.
“DEVICE NAME Saving. . .” appears, and the
device number you have set is stored.
9
When the setting is completed, press the MENU
button.
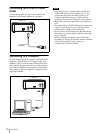
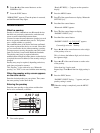
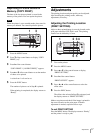
Printing a Picture
The UP-DX100 automatically receives and prints the
image sent from the camera that is connected with the
Bluetooth functions. Only JPEG-format graphic-image
files can be received. Graphic images sent from a
computer connected with the printer using a USB cable
can also be printed out.
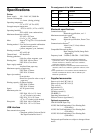
During printing of graphic images sent from the camera
or computer, the process is displayed on the operation
display, as follows:
When printing is completed, “Ready BT RSSI [))))]”
appears.
Receiving Image
BT [>>>>>>>>>>]
Receiving image data
(This is an example of the
Bluetooth connection.)
PROCESSING
Processing received data
PRINTING
[YELLOW]
Printing the yellow
PRINTING
[MAGENTA]
Printing the magenta
PRINTING
[CYAN]
Printing the cyan
PRINTING
[LAMI]
Laminating a printout