


Adjusting the dot alignment 43
To select a setting box
❏ Click on the box you want to select or move to by using your keyboard’s
Tab or arrow keys. The currently selected setting box is highlighted on
the screen.
To change a setting
❏ After you select a setting box, click on the box or press Enter to pull down
a list of available settings.
❏ Select the setting you want to use in the list by double-clicking on it, or by
moving to it with the arrow keys and pressing Enter.
Note:
An asterisk to the right of a setting indicates that it is the default.
The settings in the General, Font, and Paper windows are identical to those in
the EDS Mode. See “EDS Mode Settings” on page 31 for details.
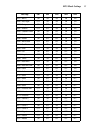
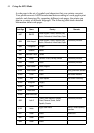
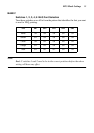
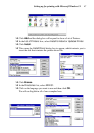
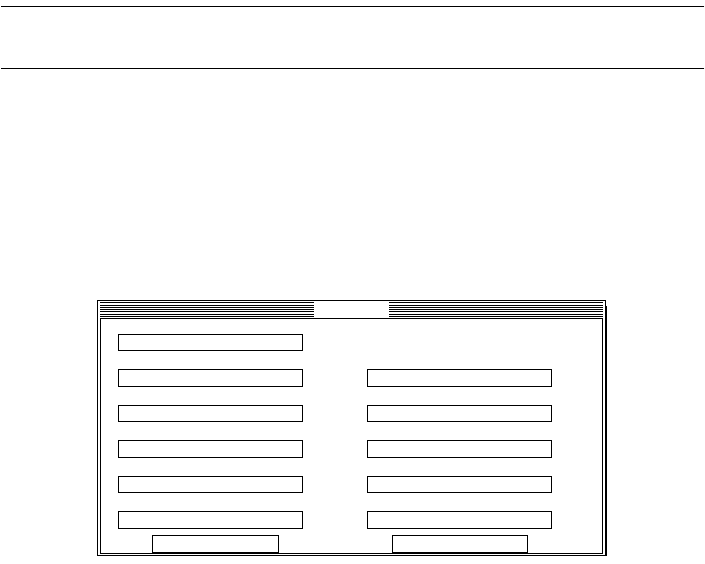
Adjusting the dot alignment
❏
Click on Adjust or press the F7 function key.
❏ Use the above window to test and adjust the vertical alignment of the
printer in each printing mode. See “Adjusting the dot alignment” on
page 72 for full details on dot alignment.
Adjust
Normal Mode
*
Multi-Part Mode
0
*
DRAFT
0
*
D-Density/Speed
0
*
D-Density P-Graphics
0
*
NLQ
0
*
Normal-Density
0
*
Plotter-Graphics
0
*
CRT Graphics I
0
*
CRT Graphics II
0
*
Double-Density
0
*
F9:Test F10:Test All
Quadruple-Density