83
-
5
15
-
0
00
Rev.
B
53
7.
5
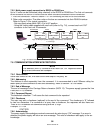
CONNECTING POWER SUPPLIES TO RS232 OR RS485 BUS
7.
5.1
Single power supply
1. Selec
t the desired interface RS232 or RS485 using rear panel setup switch SW1
-
6 (Section 4
-
4).
-
RS232: DOWN position
-
RS485: UP position
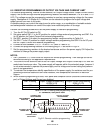
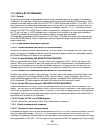
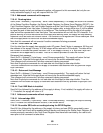
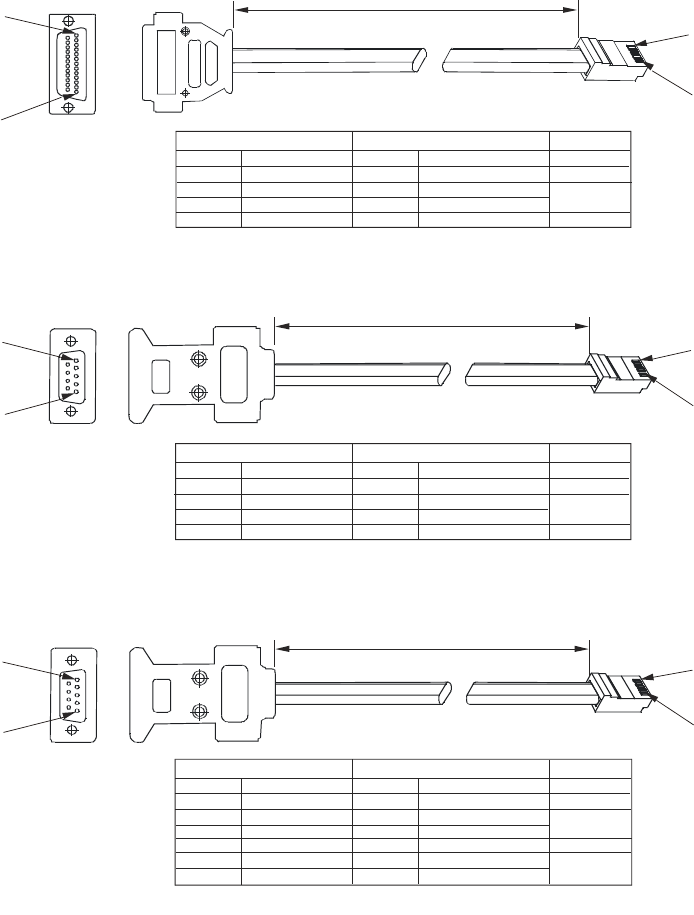
2. Connect rear panel IN connector to the controller RS232 or RS485 port using a suitable shielded
c
a
ble. Refer to F
igures 7
-
2, 7
-
3 and 7
-
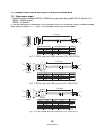
4 for available RS232 and RS485 cables.
2
3
7
1
8
7
1
PIN NO.
PIN NO.
NAME
NAME
SHIELD
TX
RX
SG
SHIELD
RX
TX
SG
DB-25 CONNECTOR
8 PIN CONNECTOR
REMARKS
TWISTED
PAIR
8
1
13
1
2
3
5
7
8
1
PIN NO.
HOUSING
HOUSING
PIN NO.
NAME
NAME
SHIELD
RX
TX
SG
SHIELD
TX
RX
SG
DB-9 CONNECTOR
8 PIN CONNECTOR
REMARKS
TWISTED
PAIR
8
1
5
1
9
8
1
5
4
6
3
1
5
4
PIN NO.
HOUSING
HOUSING
PIN NO.
NAME
NAME
TWISTED
PAIR
TWISTED
PAIR
SHIELD
TXD
TXD
SG
RXD
RXD
SHIELD
RXD
RXD
SG
TXD
TXD
DB-9 CONNECTOR
8 PIN CONNECTOR
REMARKS
-
+
+
+
+
-
-
-
8
1
5
1
Fig.7-2: RS232 cable with DB25 connector (P/N: GEN/232-25)
Fig.7-3: RS232 cable with DB9 connector (P/N: GEN/232-9)
Fig.7-4: RS485 cable with DB9 connector (P/N: GEN/485-9)
L=2m typ.
L=2m typ.
L=2m typ.
Sockets
Sockets
Sockets


