


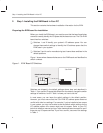

Step 2: Installing the Debugger Software / Step 3: Setting Up the Debugger Environment
7
Installing the Evaluation Module and the C Source Debugger
3. Step 2: Installing the Debugger Software
This section explains the simple process of installing the debugger software
on a hard-disk system.
1) Make a backup copy of the DOS and/or MS-Windows debugger product
disk. (If necessary, refer to the DOS manual that came with your comput-
er.)
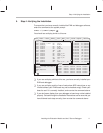
2) On your hard disk or system disk, create a directory named c3xhll. This
directory will contain the ’C3x C source debugger software. To create this
directory, enter:
MD C:\C3XHLL
3) Insert either the DOS or MS-Windows debugger product disk into drive A.
Copy the contents of the disk.
COPY A:\*.* C:\C3XHLL\*.* /V
Repeat this step for the other product disk if you want to be able to run both
the DOS and MS-Windows versions of the debugger.
The DOS version of the debugger executable is called evm30.exe, and the
MS-Windows version of the debugger executable is called evm30w.exe.
Throughout this document, the executable for the debugger is referred to
as simply evm30.
4. Step 3: Setting Up the Debugger Environment
To ensure that your debugger works correctly, you must:
- Modify the PATH statement to identify the c3xhll directory.
- Define environment variables so that the debugger can find the files it
needs.
- Identify any nondefault I/O space used by the EVM.
Not only must you do these things before you invoke the debugger for the first
time, you must do them any time you power up or reboot your PC.
You can accomplish these tasks by entering individual DOS commands, but
it’s simpler to put the commands in a batch file. You can edit your system’s
autoexec.bat file; in some cases, modifying the autoexec may interfere with
other applications running on your PC. So, if you prefer, you can create a sepa-
rate batch file that performs these tasks.