7
Programming Hints
Leaving the T100 plugged in overnight will typically set the time and date
automatically utilizing the Atomic Synchronization Signal. Once the time
and date are set simply skip over these features when setting the T100.
It is recommended that you program all functions in one sequence. However,
you may set functions independently by following the directions in
parenthesis that refer “to just entering the program mode” at the start of
each programming step. Note: The time clock will not function unless you
exit Programming Mode by sliding the Programming Switch to “Normal”.
The <AM IN> button functions as the feature selection button and advances
you through the program mode. Pressing the <AM IN> button allows you
to skip over programming steps or scroll to the setting you would like to
change.
<OT OUT> saves the program changes to memory.
IMPORTANT: If
“OUT3”
is flashing the programming changes are not saved.
Time is displayed in 24-hour format when the clock is in program mode (i.e.
3:00 PM will be 15:00).
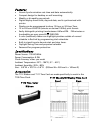
PM hours are indicated on Time Card by minutes being over scored.
Example: Two fifteen in the afternoon would print as 02:15 in 12-hour format
or 14:15 in 24-hour format.
To return to the original factory settings press the <RESET> button with the
end of a pen with the programming switch in “NORMAL” mode. The
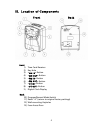
<RESET> button is within the hole marked “A” to the left of the PROGRAM
switch. Warning: Resetting will erase your current programming.
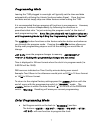
Enter Programming Mode
• Set Program switch on the back to “PROGRAM” position.
The buttons <AM IN>, <AM OUT>, <PM IN>, <PM OUT>, <OT IN>,
<OT OUT> will now function to program the clock.


