


2-6
Chapter 2: UNIT AND SOFTWARE INSTALLATIONS
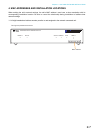
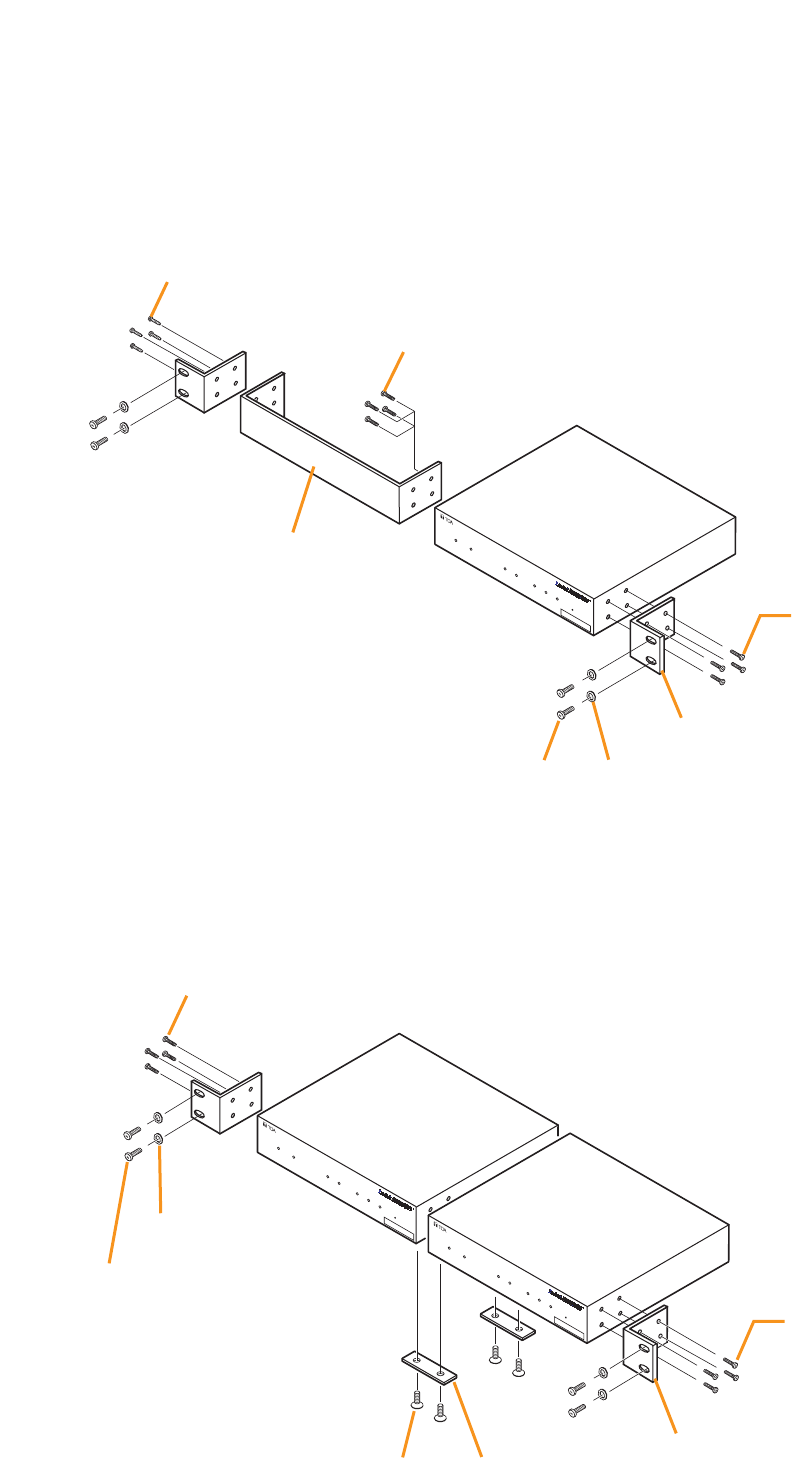
3. RACK MOUNTING
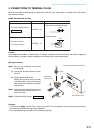
Use the optional mounting hardware set when installing the unit in an equipment rack. Be sure to remove the
rubber feet located on the unit's bottom surface before mounting.
• Use the optional MB-15B-BK hardware set when mounting a single unit.
00-05-F9-FF-80-81
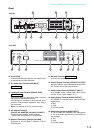
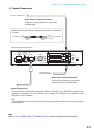
NETWORK AUDIO ADAPTER NX-100S
LNK/ACT FD/COL SIGNAL
INPUT
PEAK
STATUS
ERROR
RUN
RESET
NX-100/100S
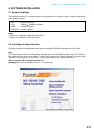
M3 x 10 machine screw*
2
(supplied with NX-100/100S)
M3 x 10 machine screw*
2
(supplied with NX-100/100S)
Rack mounting bracket*
1
Blank bracket*
1
Fiber washer (for M5)*
1
5 x 12 rack mounting screw*
1
3 x 4 tapping screw*
1
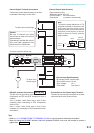
00-05-F9-FF-80-81
NETWORK AUDIO ADAPTER NX-100S
LNK/ACT FD/COL
SIGNAL
INPUT
PEAK STATUS
ERROR
RUN
RESET
00-05-F9-FF-80-81
NETWORK AUDIO ADAPTER NX-100S
LNK/A
CT
FD/COL
SI
GNAL
INPUT
PEAK
STATUS
ERROR
RUN
RESET
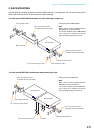
NX-100/100S
NX-100/100S
M3 x 10 machine screw*
2
(supplied with NX-100/100S)
M3 x 10 machine screw*
2
(supplied with NX-100/100S)
Rack mounting bracket*
1
Fiber washer (for M5)*
1
Coupler*
1
5 x 12 rack mounting screw*
1
M3 x 6 oval head screw*
1
• Use the optional MB-15B-J hardware set when mounting 2 units.
*
1
Component parts of MB-15B-BK
*
2
Note
Never use the screws supplied with the
MB-15B-BK to mount the bracket.
The screws supplied with the MB-15B-BK
are so long as to damage the internal
parts, possibly causing the unit to fail.
*
1
Component parts of MB-15B-J
*
2
Note
Never use the screws supplied with the
MB-15B-J to mount the bracket.
The screws supplied with the MB-15B-J
are so long as to damage the internal
parts, possibly causing the unit to fail.