How to Perform Scan to File or USB 39
6
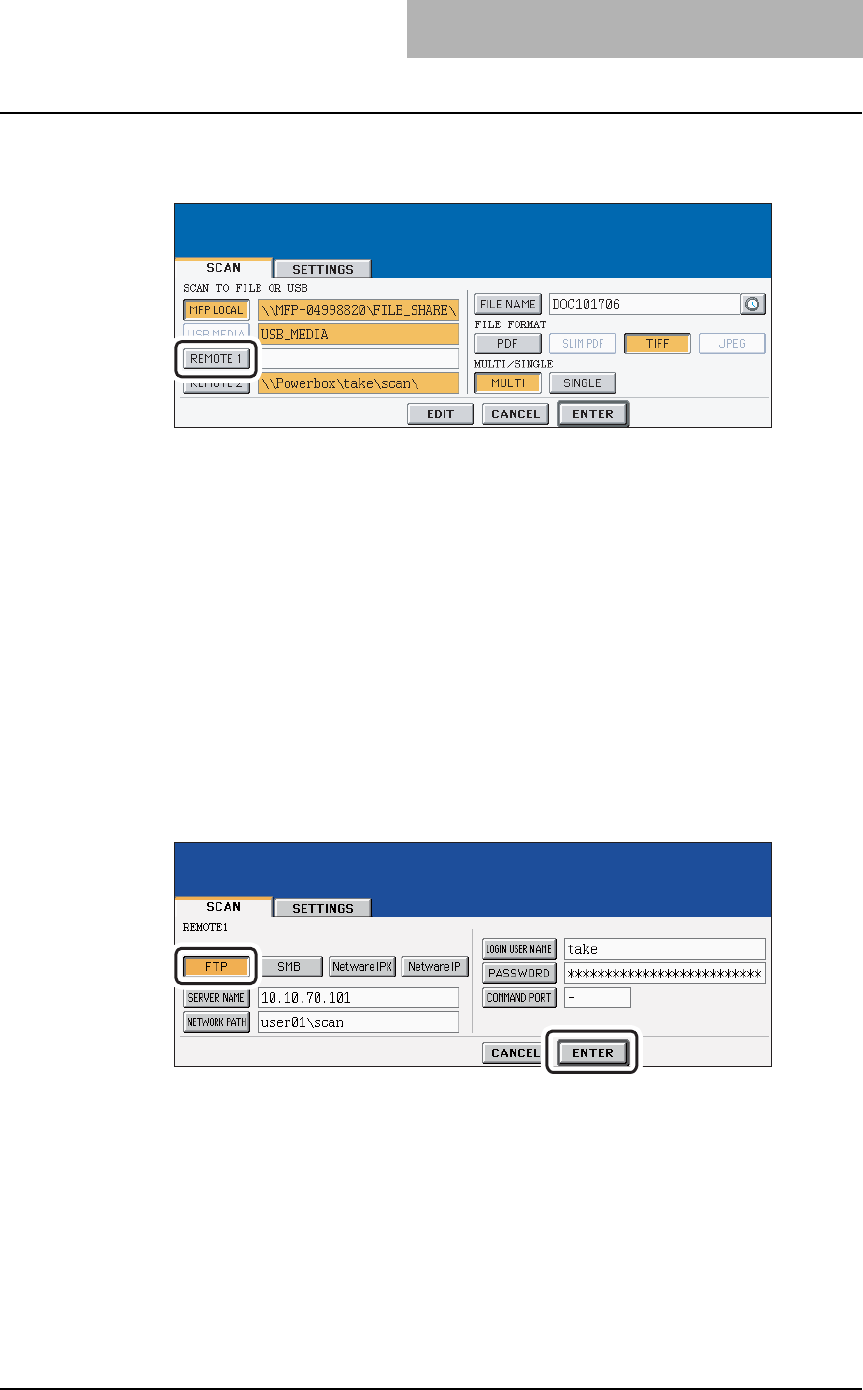
If you want to store the scanned data in network folder, press the
[REMOTE 1] or [REMOTE 2] buttons.
y If the selected remote destination (REMOTE 1 or REMOTE 2) is configured to save
the scanned data in specified network folder by the administrator, the button will be
the reversed button when you press it. In this case, users cannot change the destina-
tion. If the remote destination needs to be changed, it can be configured in the
Administration Tab of the TopAccess. Please consult your network administrator.
y If the selected remote destination (REMOTE 1 or REMOTE 2) is configured for users
to specify the desired network folder, the screen to set up the remote destination is
displayed.
7
If the screen to set up the remote destination is displayed by press-
ing the [REMOTE 1] or [REMOTE 2] button, specify the remote des-
tination. You can specify the remote destination using FTP, SMB,
NetWare IPX, or NetWare IP.
When you want to store the data using FTP, select the [FTP] button
and specify the following items as you require. Then press the
[ENTER] button.
y [SERVER NAME]
Press this to enter the IP address of the FTP server. For example, if you want to store
the data into “ftp://10.10.70.101/user01/scan/”, enter “10.10.70.101” here.
y [NETWORK PATH]
Press this to enter the folder path to the folder where you want to store the data in the
FTP server. For example, if you want to store the data into “ftp://10.10.70.101/user01/
scan/”, enter “user01\scan” here. Make sure to use “\” instead of “/” to specify the path.
y [LOGIN USER NAME]
Press this to enter the user name to login the FTP server if required.
y [PASSWORD]
Press this to enter the password to login the FTP server if required.
